


23
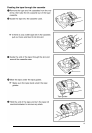
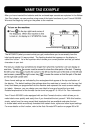
After you have inserted the batteries and the enclosed tape cassette as explained in the Before
You Start chapter, we can practice using some of the basic functions of your P-touch 530/550.
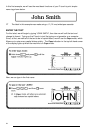
We must first begin by turning on the power to the machine.
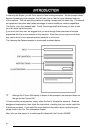
The WYSIWYG (what-you-see-is-what-you-get) mode allows you to see exactly how the
label would appear if it were printed. The flashing bracket that appears on the display is
called the “cursor”. Its is like a pointer which shows your current position and lets you select
characters in your text.
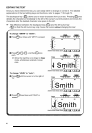
Some format settings are indicated by the rectangles which appear at the top and bottom of
the display. The default settings (the settings when the machines is turned on for the very first
time) have been pre-programmed into the machine and represent the most common settings
for labels. However, you can design your own label to have any format that you wish.
Detailed explanations of the formats can be found on page 97 to 120 of For Your Information.
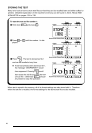
Your P-touch 530/550 is also equipped with an Auto Formats function, which allows you to
make labels more quickly and easily then if you formatted the text yourself. With this function,
simply, select from the many preset label templates that are available and enter the text
to create labels which are already formatted with certain fonts, styles and other layout settings.
For more details on this function, refer to the Auto Formats KEY section on pages 88 to 96.