Pg. 3
STATION SET-UP
DHCP Enabled:
An IP address will automatically be assigned to each IPW-1A with the default ID# as 0 and Location Name left
blank.
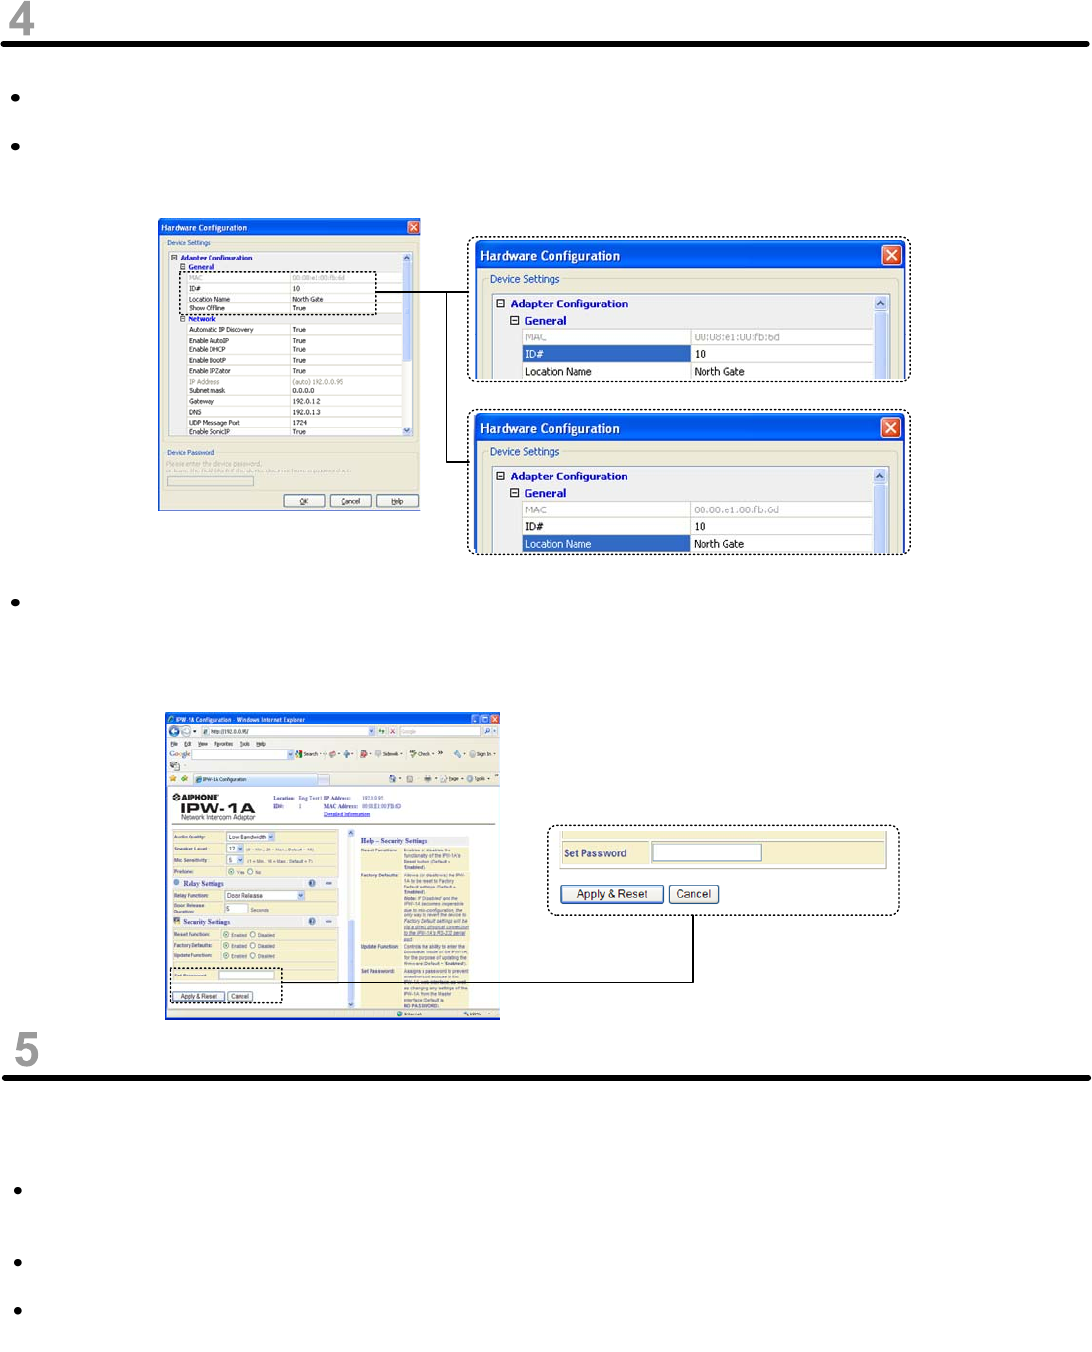
Right click on each station to open the drop down box, and select Settings. This will open the Hardware
Configuration tool. Give each adaptor a unique ID# along with a unique Location Name.
It is recommended that a password be set for each adaptor. This password can be the same for all adaptors in the
LAN if you wish. To set the password, right click on the device and select Launch in browser. Under Security
Settings, enter a password of your choosing in the Set Password field and select Apply. Once set, this password
must be entered before any changes can be made in the Hardware Configuration tool, or web interface.
RED and GREEN LEDs next to RS-232 Serial Port
Unit powering up:
While the unit is searching for its IP address, the Red LED and Green LED will blink alternately. In the absence of a
DHCP server any network activity during this time should allow it to get an IP address, such as opening a web
browser.
Upon finding its IP address, the IPW-1A will use SonicIP to verbally announce that address. At this time the Red
LED will blink.
If an error is detected, the Red LED will remain on, then the Green LED will blink three or five times depending on
the error. Upon blinking the error message, the unit will reset itself. It will blink five times if the firmware is corrupt or
if there is an IP address conflict. It will blink three times if the network hardware could not be initialized, or if there is
a corrupt MAC address.
HARDWARE DIAGNOSTICS


