


EPSON Stylus Photo 825
11/02 EPSON Stylus Photo 825 - 9
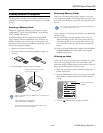
Cleaning takes about 30 seconds, during which the printer
makes some noise and the green Processing light flashes.
4. When the green Processing light stops flashing, make sure
paper is loaded in the printer and click
Print nozzle check
pattern
. Then click Print. The nozzle check pattern is
printed.
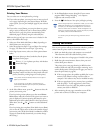
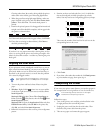
5. Examine the printed pattern. Each staggered horizontal and
straight vertical line should be complete, with no gaps in the
dot pattern, as shown below:
❏ If the nozzle check pattern has no gaps or lines, click
Finish.
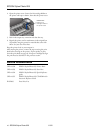
❏ If any dots are missing (as shown below), click
Clean to
clean the print head again.
If you don’t see any improvement after cleaning three or four
times, try turning off the printer and waiting overnight—this
allows any dried ink to soften—and then try cleaning the print
head again.
Aligning the Print Head
If your printouts contain misaligned vertical lines, or you see
light or dark horizontal banding, you may need to align the
print head. Make sure you’ve cleaned the print head first, as
described in the previous section, to ensure that the problem
isn’t caused by clogged nozzles.
If your image looks texturized or blurry, make sure the
platen gap lever is not in the
^ position for envelopes.
1. Turn on the printer and load a sheet of letter-size plain
paper.
2. Windows: Right-click the printer icon on your taskbar
(in the lower right corner of your screen) and select
Print
Head Alignment
.
Macintosh OS 8.6 to 9.x: Choose
File > Page Setup or
Print. Click the Utility button, then click the Print
Head Alignment
button.
Macintosh OS X: Open the
Applications folder and select
EPSON Printer Utility. Select SP 825 in the printer list,
click
OK, and select Print Head Alignment.
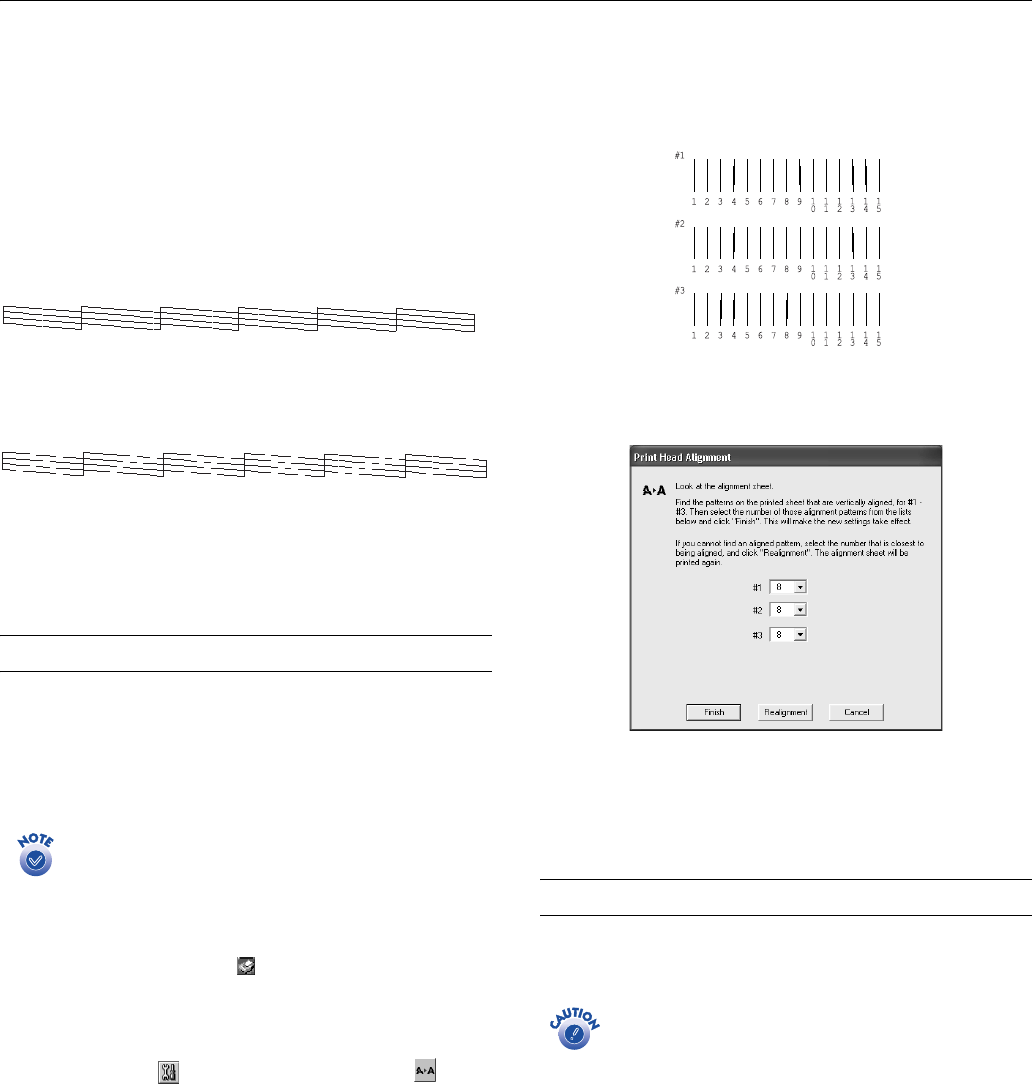
3. Follow the instructions on the screen to print an alignment
pattern.
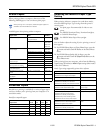
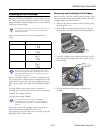
4. Examine each row and select the line (1–15) in which the
dots are best-aligned vertically (printed on top of each
other). You may need to use a magnifying glass or eye loupe.
Then enter the number of the best line for each row in the
corresponding box on the screen:
5. Click
Finish.
6. If you chose a line other than number 8, click
Realignment
to print another test page, then repeat step 4.
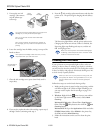
Transporting the Printer
If you move your printer some distance, you need to prepare it
for transportation in its original box or one of a similar size.
To avoid damage, always leave the ink cartridges
installed when transporting the printer.
Follow these steps:
1. Turn on the printer, wait until the print head locks in the
far right position, then turn off the printer.
2. Unplug the power cord from the electrical outlet. Then
disconnect the printer cable from the printer.
3. Take out any paper and remove the paper support.