RQT9412
41
Displays Page
TV screen and video
Sound
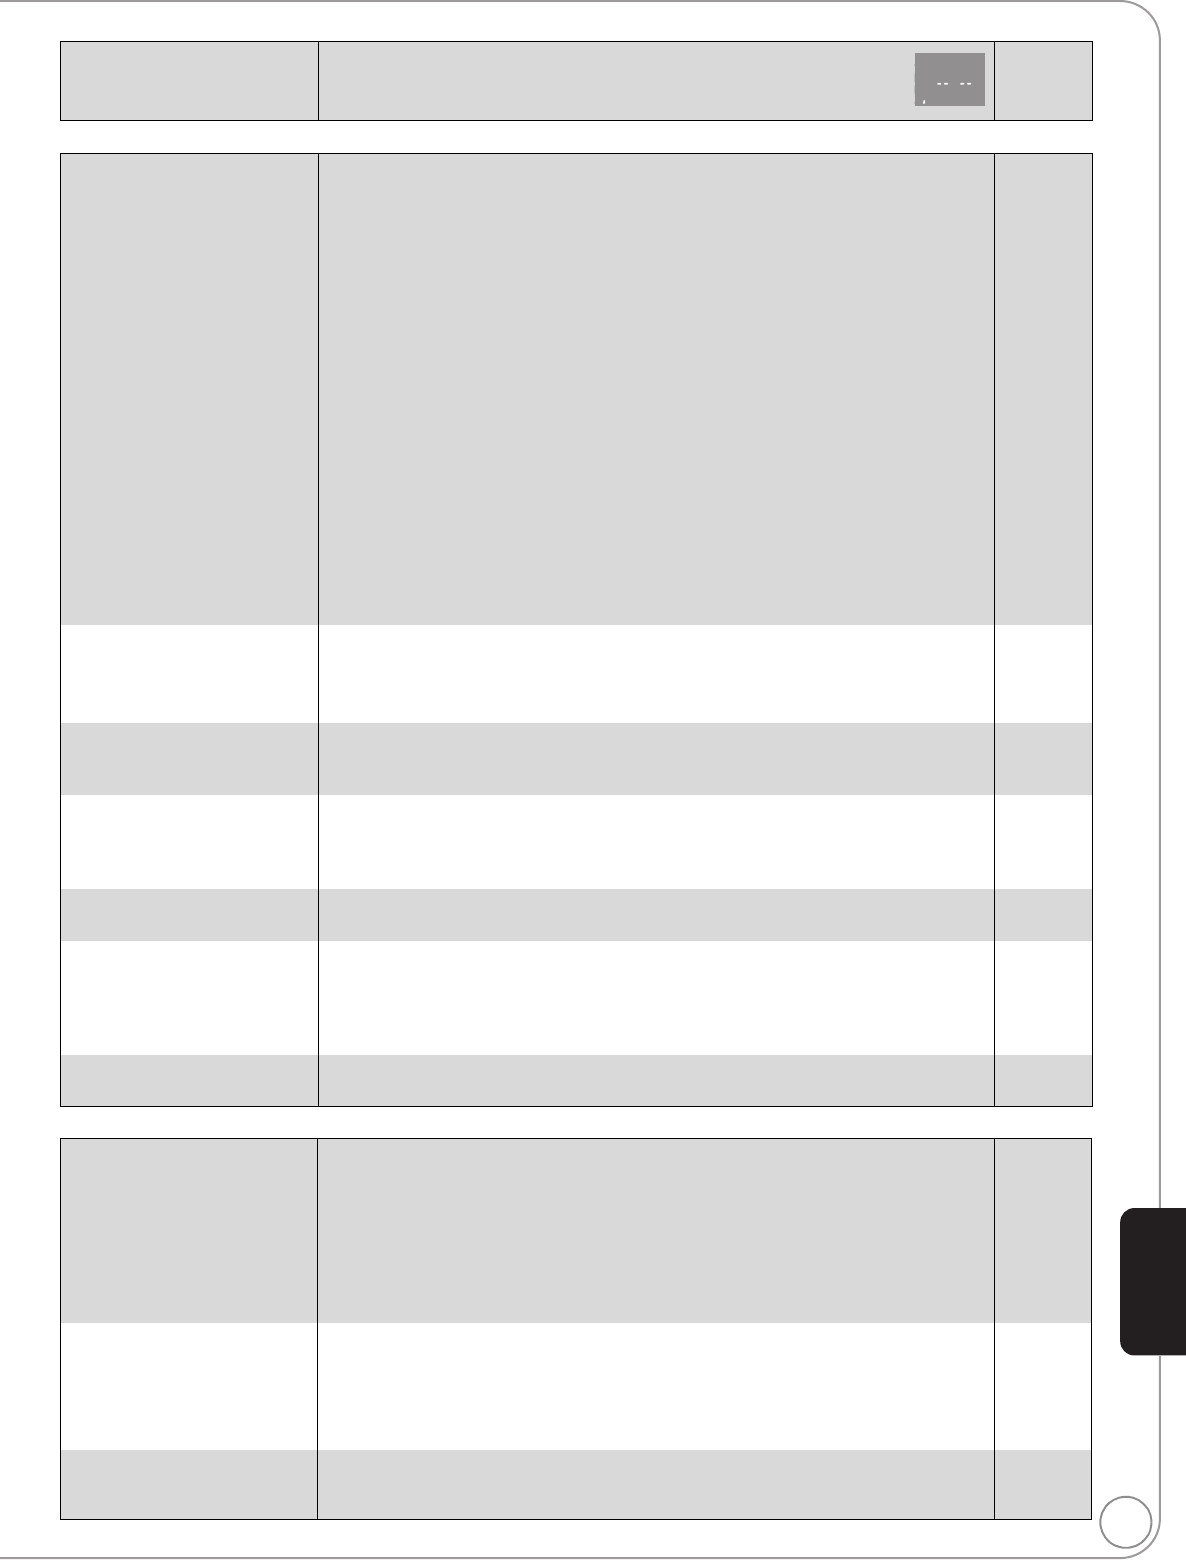
The tape counter is not
changing.
≥
The seconds display will display as shown on the right for unrecorded parts
of the tape. It will also display like this when the dirty or damaged tape is
used or when this unit is malfunctioning. In such cases, contact your dealer.
—
The images from this unit
do not appear on the
television.
Picture is distorted.
Jittering occurs.
≥Make sure that the television is connected to either the VIDEO OUT terminal,
COMPONENT VIDEO OUT terminals or HDMI AV OUT terminal on this unit.
≥Make sure that the television’s input setting (e.g., VIDEO 1) is correct.
≥An incorrect resolution is selected in “Component Video Resolution”, when the
television is connected to COMPONENT VIDEO OUT terminals. While stopped,
press and hold [∫] and [1] (PLAY) on the main unit at the same time for more
than 5 seconds to cancel this setting. Set the item again.
≥
If “24p Output” is set to “On” when the unit is connected to a TV through any terminal other
than HDMI, images may not display properly. In this case, set “24p Output” to “Off”.
≥When “24p Output” is set to “On”, HDMI authentication takes place where 24p
images switch to other images, and a black screen is displayed.
≥When “24p Output” is set to “On”, jittering may occur while playing DVD-Video
other than 24p images. In this case, turn “24p Output” to “Off”.
≥An incorrect resolution is selected in “HDMI Resolution”, when the television is
connected to HDMI AV OUT terminals. While stopped, press and hold [∫] and
[1] (PLAY) on the main unit at the same time for more than 5 seconds to cancel
this setting. Set the item again. However, Dolby Digital Plus, Dolby TrueHD, and
DTS-HD audio are not output in bitstream. To output the bitstream, select “Restore
Default Settings” to restore the factory presets and make proper settings.
≥Picture may not be seen when more than 4 devices are connected with HDMI
cables. Reduce the number of connected devices.
11
—
34
34
34
34
36
—
The screen changes
automatically.
≥
When the “Screen Saver Function” in the Setup menu is set to “On”, the display may return
to the screen saver mode automatically if there is no operation for 10 minutes or more.
≥
When CD or MP3 is played, the screen switches to Screen Saver mode if there is no
operation for 2 minutes after starting playback. (Playback continues.)
33
—
Video is not output in high
definition.
≥High definition video cannot be output through the VIDEO OUT terminals.
≥Confirm that the “HDMI Video Mode”, “HDMI Resolution”, and “Component Video
Resolution” in the Setup menu are set properly.
—
34
The 4:3 aspect ratio picture
expands left and right.
Screen size is wrong.
≥
Use the television to change the aspect. Refer to your television’s operating instructions.
≥When using a component video cable, set “Progressive” to “Video”. If the situation
is not restored after that, set “TV Aspect” to “4:3 Pan & Scan”.
≥When using an HDMI cable, change “TV Aspect” type to “16:9”.
—
31, 34
34
There is a lot of after-image
when playing video.
≥Turn “3D NR” or “Integrated NR” off if it is on. 31
When playing DVD-Video
using progressive output,
one part of the picture
momentarily appears to be
doubled up.
≥When you use the HDMI AV OUT terminal for video output, follow the steps below
for setting:
1 Connect this unit to the TV with any cable except the HDMI cable.
2 When you connect with the Component Video cable, set “HDMI Video Mode” to
“Off” and “Component Video Resolution” to “480i” in the Setup menu.
34
Still pictures (JPEG) do not
play back normally.
≥The images that were edited on the PC, such as Progressive JPEG, etc., may not
play back.
37
No sound.
Low volume.
Distorted sound.
Cannot hear the desired
audio type.
≥Check the connections and the “Digital Audio Output” settings. Check the input
mode on the amplifier/receiver if you have connected one.
≥Press [AUDIO] to select the audio.
≥
The sound effects (Re-master, V. Surround, etc.) will not work when the bitstream signal is
output from the HDMI AV OUT terminal or the DIGITAL AUDIO OUT terminal.
≥Audio may not be heard when more than 4 devices are connected with HDMI
cables. Reduce the number of connected devices.
≥To output audio from a device connected with an HDMI cable, set “HDMI Audio
Output” to “On” in the Setup menu.
11–13, 33
21, 26
—
—
34
Cannot switch audio. ≥There are discs for which audio cannot be changed because of how the disc was
created.
≥When connecting an amplifier/receiver using an optical digital audio cable or an
HDMI cable, you cannot switch the audio if “Dolby D/Dolby D +/Dolby TrueHD” or
“DTS/DTS-HD” is set to “Bitstream”. Set “Dolby D/Dolby D +/Dolby TrueHD” or
“DTS/DTS-HD” to “PCM” or connect using AUDIO OUT terminal.
—
12
, 13, 33
Stereo audio is sounding
muffled while playing back
the VHS
≥Tracking is off.
≥The tape being played back is damaged.
26
—
Reference
DMP-BD70V-RQT9412_ENG.book 41 ページ 2009年2月27日 金曜日 午後7時23分
