6
SECTION 5: ASSEMBLY INSTRUCTIONS
IMPORTANT:
After assembly, service engine
with gasoline, and check oil level as instructed in
the separate engine manual packed with your unit.
NOTE:
References to right or left side of the snow
thrower are determined from behind the unit in the
operating position.
UNPACKING
• Remove staples or break glue on the top
flaps of the carton. Remove any loose parts
included with unit (i.e., owner’s manual, etc.).
• Cut along dotted lines and lay end of carton
down flat. Remove packing material.
• Roll unit out of carton. Check carton
thoroughly for loose parts before discarding.
TOOLS REQUIRED FOR ASSEMBLY
• (1) 3/8" or adjustable wrench
• (2) 7/16" or adjustable wrench
• (2) 1/2" or adjustable wrench
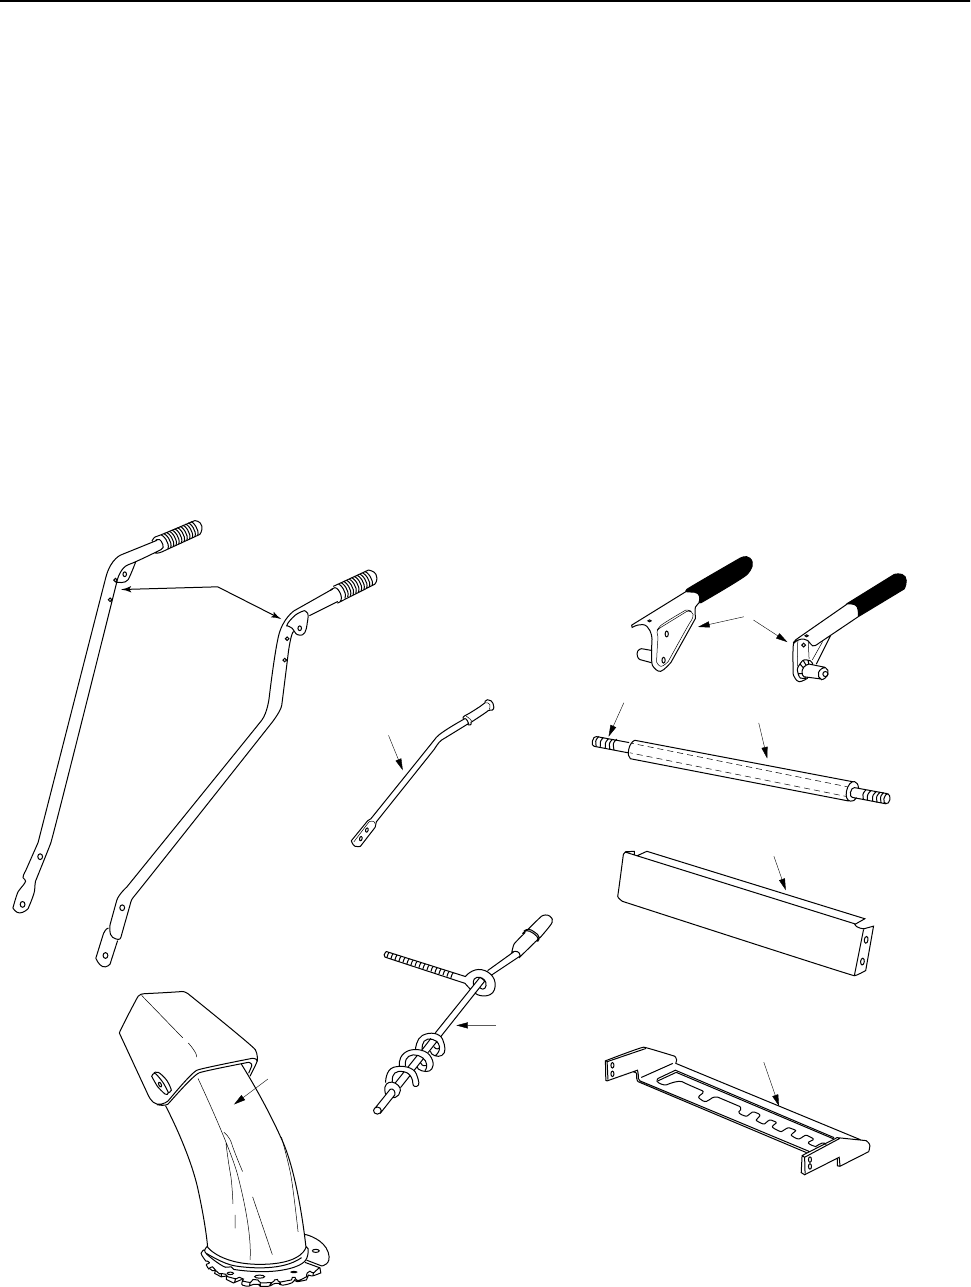
LOOSE PARTS IN CARTON
(See Figure 3)
Figure 3
A (2) Handles (Right and Left)
B (1) Pivot Rod
C (1) Cover Tube
D (2) Clutch Grips (Right and Left)
E (1) Handle Panel
F (1) Speed Selector Plate
G (1) Shift Lever
H (1) Chute Crank Assembly
J (1) Chute Assembly
I (1) Hardware Pack
A
B
C
D
E
F
G
H
J


