


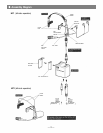
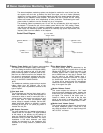

<Assembly Instructions for left-side operation>
1. Assemble the HY headset according to the
assembly diagram.
(A) Attach the head pad marked "L" to the left side of
the headset, and the head pad marked "R" to the
right side, by pressing firmly until they "snap" into
place.
(B) Connect the interconnecting cable to the headset
and the beltpack, ensuring that the locking ring of
each connector is fully engaged.
(C) If the internal monitoring system is to be used,
connect the stereo mini plug of the PH 5 head-
phone to the headphone jack of the headset.
(Note: Other stereo headphones with an im-
pedance of 16 ohms or greater may be used if
desired.)
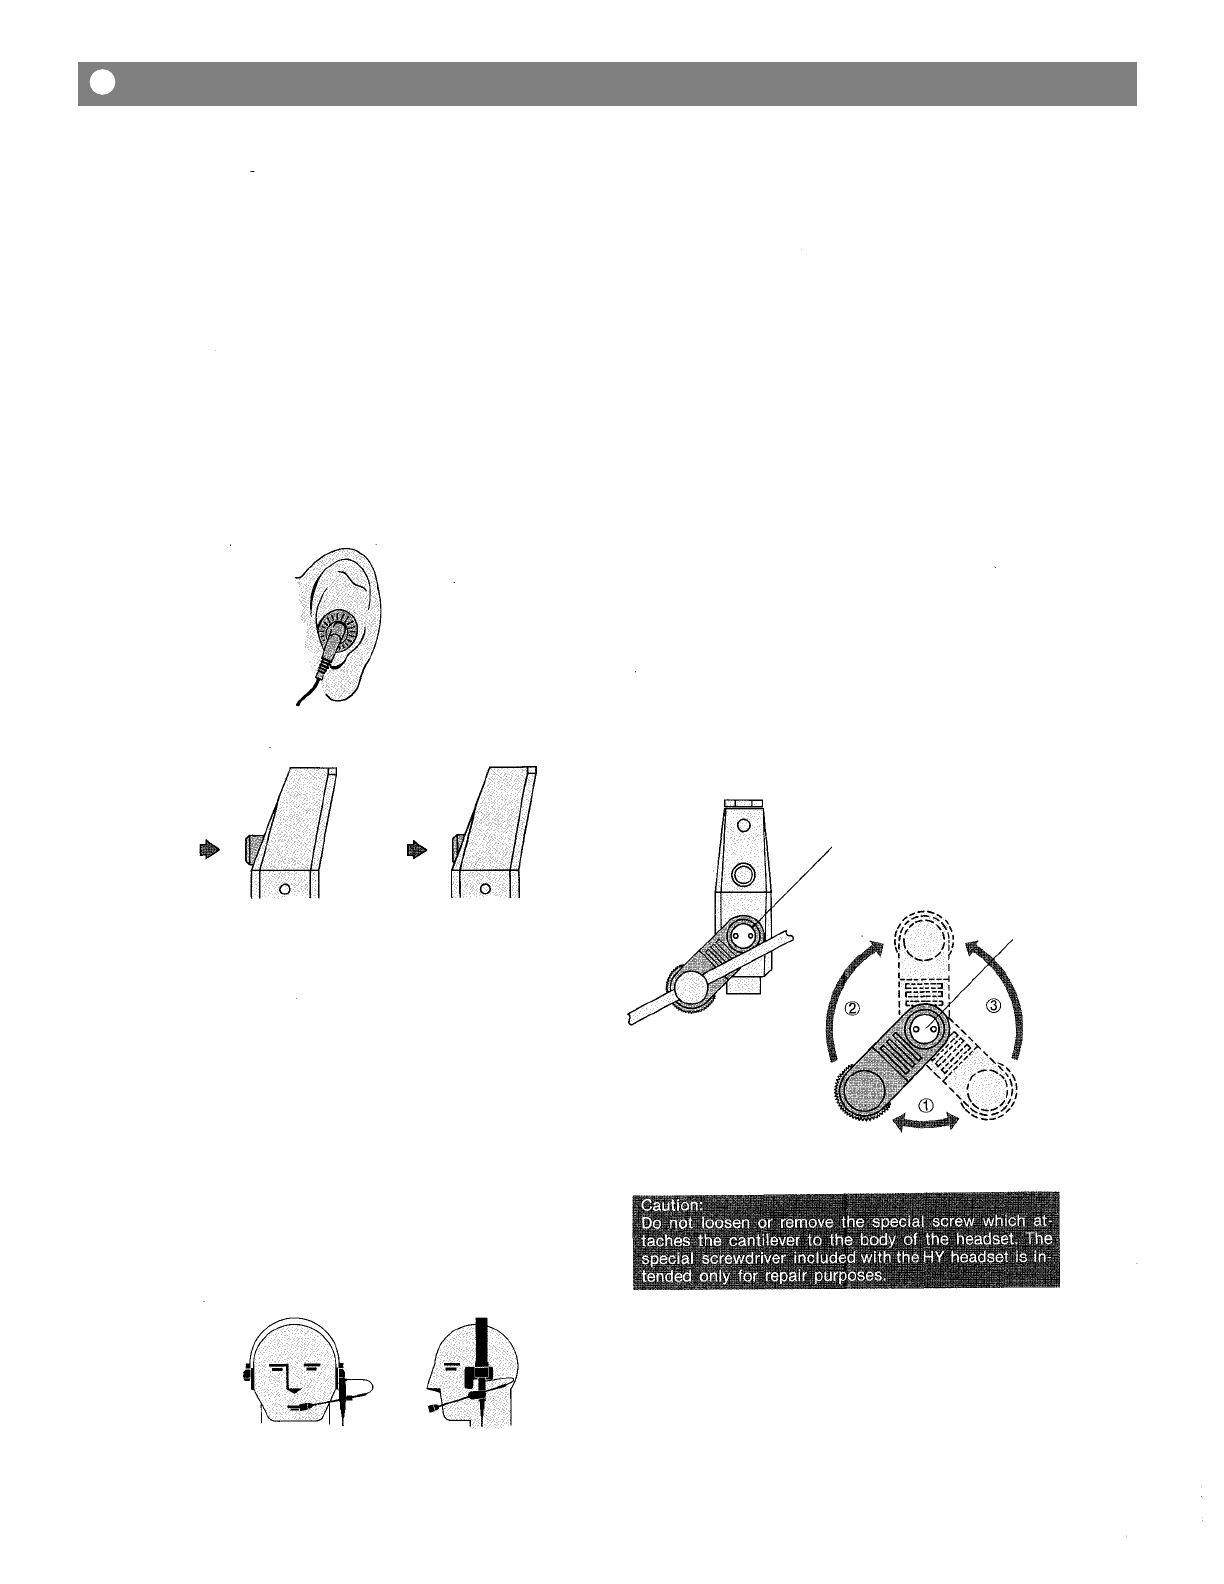
2. Insert the "L" and "R" units of the headphone into
the respective left and right ears as illustrated.
6. Turn the beltpack power switch to "OFF," and
rotate the monitor level volume control to "MIN"
and the monitor balance control to its center pos-
tion. Connect an XLR cable between the MIC
OUTPUT of the beltpack, and a low-Z input of a
mixer or sound system. If the integral monitoring
system is to be used, insert a stereo or mono 1/4"
phone plug into the LINE INPUT JACK, and slide
the line mode selector switch to the appropriate
setting.
7. Place the beltpack power switch in the "ON" posi-
tion. Set the COUGH BUTTON to the "ON" posi-
tion, and the red LED will light to indicate "mic
live" status. Rotate the MONITOR LEVEL VOLUME
CONTROL to obtain a desirable level in the head-
phones, and adjust the MONITOR BALANCE CON-
TROL to obtain the proper "mix" between the direct
vocal and the line input monitor signal.
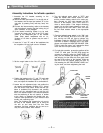
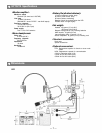
8. For right-side operation, reverse the positions of the
"L"and "R" head pads. The MIC ARM should be
reversed by carefully pulling the CANTILEVER out
away from the headset (just enough for clearance)
and swinging it to the other side; then gently lower
the arm to the surface of the headset. Orient the
red LED of the mic capsule toward the face, by
first loosening the MIC ADJUSTMENT KNOB, turn-
ing the shaft, and then retightening the knob.
3. Set the cough button to the "mic off" position.
"mic
on"
position
"mic off"
position
4. Position the headset so the "L" and "R" head pads
rest immediately above the respective "L" and "R"
ears, and adjust the headband for a comfortable fit.
5. Loosen the mic adjustment knob, and position the
mic capsule approximately 10-25mm (1/2-1 inches)
from the corner of the mouth. Ensure that the can-
tilever is positioned fully downward, and carefully
tighten the mic adjustment knob to hold the mic
arm in the desired location. You should experiment
with the positioning of the mic capsule, in relation
to the mouth, to determine the location that pro-
vides the best reproduction of your individual vocal
tonality and performing style.
Note: The cantilever that connects the mic arm to
the body of the headset allows you to swing the
mic arm up and away from the face when
necessary, and then reposition the mic arm to ex-
actly the same location when desired.
CANTILEVER
OFF
POSITION
SPECIAL
SCREW
POSITION FOR
LEFT-SIDE
OPERATION
POSITION FOR
RIGHT-SIDE
OPERATION
Operating Instructions
— 3 —