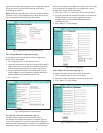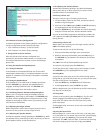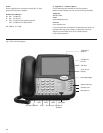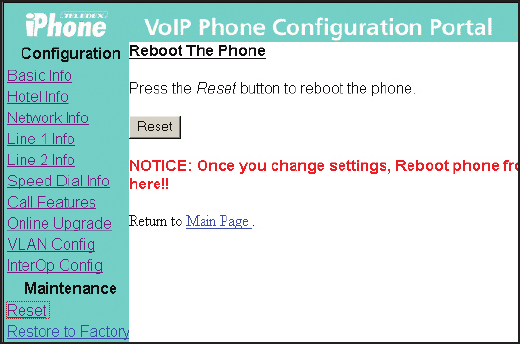
Fig 9: Reset the Phone
3.2.9 Restore to Factory Configuration
To restore the phone to the factory (default) configuration
via the configuration portal, follow these steps:
1. Click “Restore to Factory” on the left menu.
2. Click “Restore” to restore factory settings.
4. Using the SIP LD Series IP Phone
After the SIP LD series has been configured and
activated by the network administrator, it is ready to use.
This section describes how to place, receive and manage
phone calls.
4.1 Using the Handset and Speakerphone
4.1.1 Using the Handset
If the handset is connected and lifted out of the cradle
(releasing the hookswitch), it will take precedence over the
speaker or a headset (if connected). The speaker or headset
will be muted.
4.1.2 Using the Speakerphone
If the handset is in its cradle with no headset connected,
and the SPEAKER key is pressed, the speakerphone is
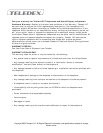
engaged, enabling handsfree calls. The SPEAKER LED
will be illuminated when this mode is active.
4.1.3 Switching between Handset and Speakerphone
When a call is in progress using the handset, press the
SPEAKER key, then hang up the handset. The SPEAKER LED
will flash, and the speakerphone will become active. If the
handset is not hung up within twelve (12) seconds, the call
will remain on the handset.
4.1.4 Adjusting the Ringer Volume
When the phone is either idle or ringing, press the up or
down arrow key to raise or lower ringer volume.
4.1.5 Adjusting the Speaker Volume
Activate the speaker through pressing the SPEAKER key. With
the speaker active, press the up or down arrow key to raise or
lower speaker volume to the desired level.
4.1.6 Adjusting the Handset Volume
Activate the handset by picking it up. With the handset
active, press the up or down arrow key to raise or lower
handset volume to the desired level.
4.2 Placing a Phone Call
There are various ways of initiating a phone call:
1. Lift the handset, listen for dial tone, and dial the phone
number, using the keypad.
2. Press one of the
LINE buttons (LINE 1 or LINE 2) activating
the speakerphone. Dial the desired number.
3. Press the SPEAKER key. An available line will be activated,
and you will hear dial tone. Dial the desired number.
As soon as the IP-PBX recognizes a valid phone number, the
call is placed. The LINE 1 (or LINE 2) LED will be illuminated
during the call.
4.3 Receiving a Phone Call
When there is an incoming call, the ringer sounds, and the
LINE 1 LED flashes quickly.
To answer the call, do one of the following:
1. Pick up the handset and begin your conversation.
2. Without removing the handset, press the
LINE 1 key, or
the
SPEAKER key, and speak in the direction of the base
microphone.
The LINE 1 LED will be illuminated during the call.
To reject the call, simply press the FLASH key.
To end the phone call, simply hang up the handset, or press
the SPEAKER key (if the speakerphone was used).
4.4 Using Mute
To prevent the other party on the line from hearing what is
being said on your end of a phone call, you may use the mute
function of the phone. To use Mute:
1. Press the
MUTE key; the MUTE LED will illuminate.
2. To disengage Mute, press the
MUTE key again.
While in Mute mode, you will be able to hear the other party,
but they will not hear you.
4.5 Using Hold
To place a call on Hold, press the HOLD key. The line will
remain engaged, but neither party will be audible to
each other. The active line’s LED will flash slowly while
Hold is activated.
To disengage Hold, and return to the call, press the LINE 1
(or LINE 2) key.
4.6 Using the Second Line
While engaged in a call on one of the lines, a call may come
in on the other line. To answer the second call, while keeping
the first call, press the HOLD key. The second call will be
connected. The LINE 1 LED will flash. To answer the incoming
call while hanging up the first call, simply press LINE 2.
7


