


FCC STATEMENT
Your B250D complies with Part 68 of FCC Rules. You must, upon request, provide
the FCC Registration Number and the REN to your telephone company or other
service provider. Both of these numbers are located on the bottom of the B250D.
You must not connect your B250D to either coin-operated systems or party line
systems.
The B250D also complies with the limits for a Class B device as specified in Part 15
of the FCC Rules. These limits provide reasonable protection against radio and TV
interference in a residential area. However, your telephone might cause TV or radio
interference, even when it is operating properly. To eliminate interference, you can
try one or more of the following corrective measures:
a) Reorient or relocate the TV or radio’s reception antenna
b) Increase the distance between the telephone and the radio or TV.
Consult your local dealer or service center if the problem persists.
4) INSTALLATION
When installing your B250D, please select a location that is located near an
unswitched AC outlet, near a modular phone line jack, and out of the way of
activities that may interfere with the telephone’s operation.
NOTE: The USOC number of the jack to be installed is RJ11C (RJ11W for a wall plate jack.)
CAUTION:You must use a Class 2 power source that supplies 12 volts AC, and delivers at least
500 mA. The supplied adapter meets these specifications. Using an adapter that does
not meet these specifications could damage the LCD display or the adapter.
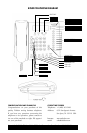
4.1 DESKTOP INSTALLATION
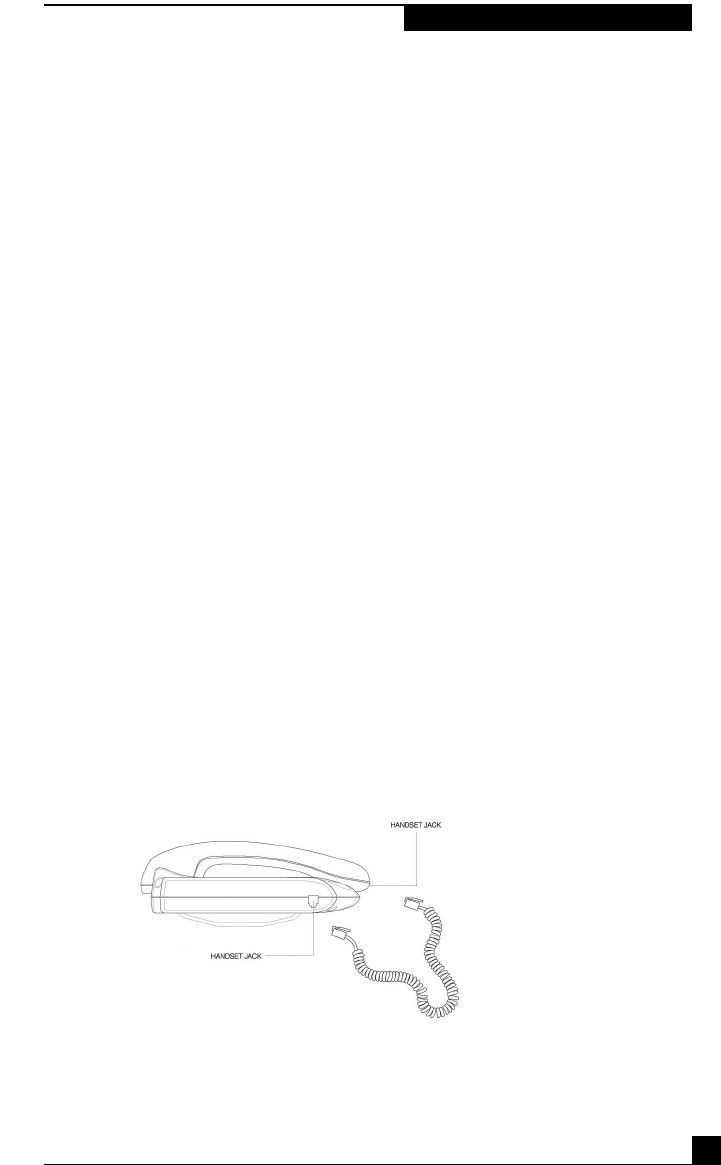
1) Plug one end of the handset coiled cord into the handset modular jack,
located on the left side of the phone base. Plug the other end into the
handset jack.
2) Install wall mount bracket into four slots at the bottom of the B250D.
3) Plug one end of the thinner, four-conductor line cord into the jack labeled
LINE on the power adapter. Plug the other end into a standard RJ-11
telephone wall jack.
4) Plug one end of the thicker, six-conductor phone cord into the jack labeled
PHONE on the power adapter. Plug the other end into the LINE jack at the
bottom of the B250D.
5) Plug the adapter into a standard AC wall outlet.
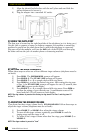
4.2 WALL MOUNTING
1) Place the flat end of the wall mount bracket upward. Install the wall
mount bracket into the four slots on the bottom of the B250D.
2) Follow steps #3 and #4 in section 4.1 Desktop Installation above for
installation of line and phone cords. Route the adapter cord through the
wall mount line cord slot.
3
Teledex B250D Users Manual
INSTALLATION
Contents Copyright © 2003 Teledex LLC