2
.
Plug
one end of the
telephone
line cord into the
TEL LINE
jack on the back
of the
base
and the other
end
into a
modular
jack
.
3
.
P
l
ug
the
AC
power conver ter
i
n
t
o
the
e
l
e
c
t
r
i
c
a
l
o
u
t
l
et
and the DC
connector
into the
jack
on the
back
of the base.
4
.
Place
the
handset
in the
base cradle. The
charge/in
use
indicator turns on,
verifying
the battery
is
charging.
5
.
Allow the phone to charge for 16 hours prior to first
u
s
e
.
If you don’t
properly
charge
the
phone,
battery
performance is
compromised.
CA
U
T
I
O
N
:
To
reduce risk of personal
i
n
j
u
r
y
,
fire , or d
a
m
ag
e
use only the power adaptor
(Manufactur
er
:
ESL,
T
ype: IA5060,
120
V
a
c
/
6
V
d
c
/
500
m
A
;
M
a
nu
f
a
ct
u
r
e
r
:
Nan
T
o
n
g
D
a
M
i
n
g
,
T
y
p
e
:
DM-SC060058,
120
V
a
c
/
60
V
d
c
/
0
-
0
.
58
A
)
listed in
t
h
e
u
se
r
’
s
guide.
T
h
i
s
power adaptor is intended to be
co
rr
e
ct
l
y
orientated in a vertical or floor mount position.
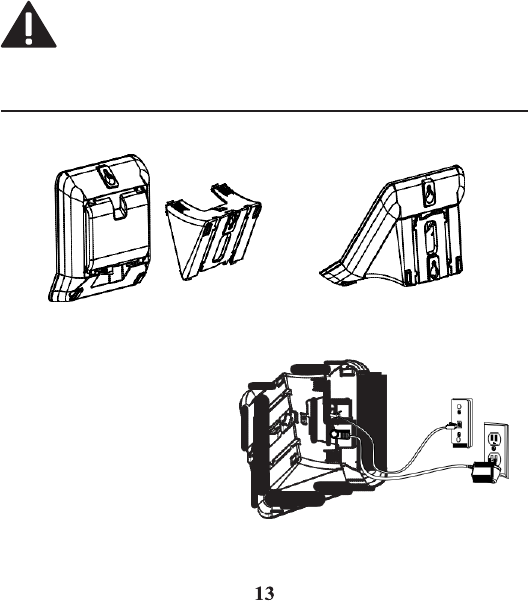
Wall mounting
the phone
To detach
the
desktop
pedestal:
1
.
Plug
one end of the straight
telephone
line cord into the
jack on the bottom of the
base.
2
.
Feed
the line cord through
the groove and plug the end
into the modular telephone
j
a
c
k
.
Excess
telephone line
c
a
n
b
e
s
t
u
f
f
e
d
i
n
t
o
t
h
e
recess
area on the bottom of
the
Base
Unit
.
3
.
Connect the small end of the power
adaptor
into the
POVER 9V DC
jack
on
the
back
of the
phone
plug the other and into an
AC
power
outlet
.


