


© 2003 RadioShack Corporation.
All Rights Reserved.
RadioShack and RadioShack.com are trademarks used by
RadioShack Corporation.
OWNER’S MANUAL —
Please read before using this equipment.
www.radioshack.com
SM
43-3910
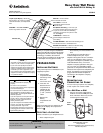
Thank you for purchasing the RadioShack
Heavy Duty Wall Phone with Caller ID/Call
Waiting ID. It offers the latest in telephone
technology. In addition, the Caller ID
memory stores and displays up to 99 single
or 64 multiple incoming phone records.
PREPARATION
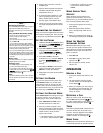
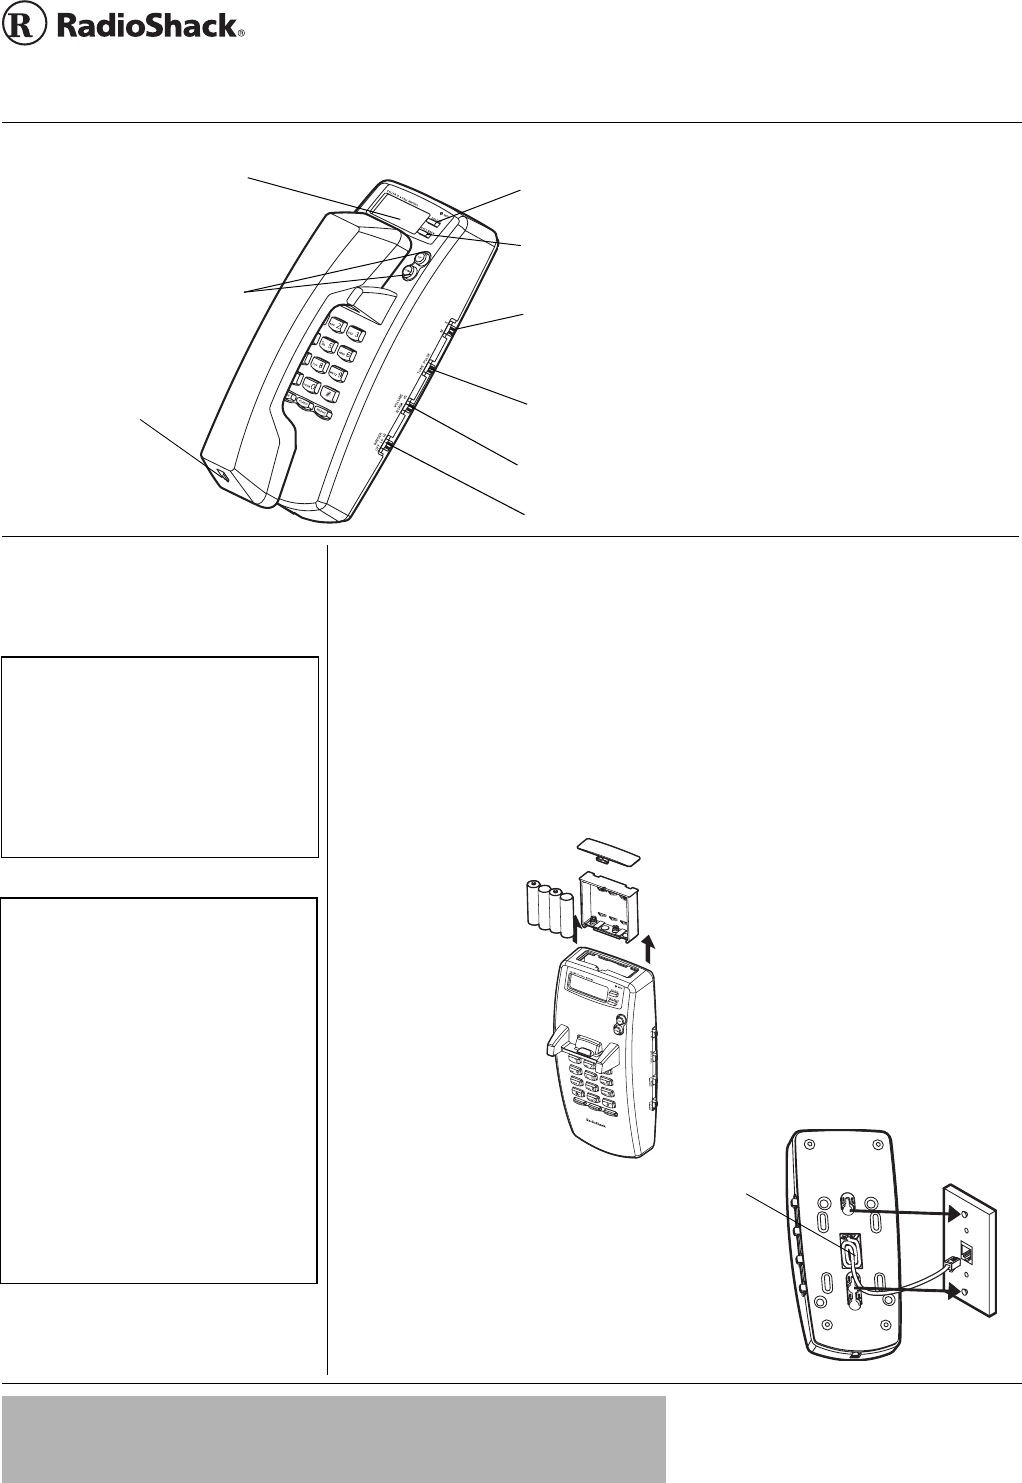
INSTALLING BATTERIES
Your phone requires four AA batteries (not
supplied) for power.
1. Lift the battery
compartment door
from the top of the
base, then
remove the cover.
2. Insert four AA
batteries into the
compartment as
indicated by the
polarity symbols
(+ and –) marked
inside.
3. Replace the
battery
compartment and
cover.
When the battery low icon appears on the
display or the display dims, replace the
batteries. Ô
SELECTING A LOCATION
Select a location for your telephone that is:
• Near a telephone jack
• Not in the way of normal activities in the
area
Your telephone connects directly to a
modular telephone line jack. If your
telephone wiring does not have a modular
jack,youcanupdatethewiringyourself
using jacks and adapters (available at your
local RadioShack store), or have the
telephone company update the wiring for
you. You must use compatible modular
jacks that are compliant with Part 68 of FCC
Rules and the requirements adopted by the
ACTA. The telephone cord and modular
plug provided is Part 68 compliant for
connecting to the telephone company
network. Ô
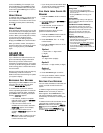
MOUNTING AND
C
ONNECTING THE PHONE
You can mount your phone on a wall plate,
a wall, or place it on a desk or table.
On a Wall Plate or Wall
1. Plug one end of the supplied short
modular cord into the
LINE jack at the
back of the base. Route any excess
cord through the strain relief.
Handset Jack
RINGER OFF/LO/HIGH — Slide to the desired setting
to set ringer volume or to disable the ringer.
TONE/PULSE — Slidetothe
desired setting toselect toneor
pulse dialing.
M/S (Master/Secondary) — Connect up to
four system modules to the same phone line,
so you can receive CID and Call Waiting
information at more than one phone on that
line. See Page 2.
VOLUME NORM/HI — Slide to the desired setting to set
the handset volume to a comfortable level.
UP/DOWN — Press UPor DOWN to
scroll through Caller ID records.
DELETE — Press to delete
the selected call record.
CALL BACK — Press to
automatically dial the selected
caller ID record.
Liquid Crystal Display —
Shows the
date and time, the number you dialed,
caller ID information, and elapsed talk
time.
Ô BATTERY NOTES Ô
• Dispose of old batteries promptly and
properly.
• Do not burn or bury batteries.
• Use only fresh batteries of the required size
and recommended type.
• Do not mix old and new batteries, different
types of batteries (standard, alkaline, or
rechargeable), or rechargeable batteries of
different capacities.
• If you do not plan to use the phone for two
weeks or longer, remove the batteries.
Batteries can leak chemicals that can
destroy electronic parts.
• If you do not replace the batteries within two
minutes, your Caller ID and telephone
memory information may be lost.
• During battery replacement, keep the line
cord plugged in to maintain Caller ID and
Speed Dialing Memories.
Ô NOTE Ô
• The USOC number of the jack to be installed
is RJ11C (or RJ 11W for a wall plate jack).
• If your home has specially wired alarm
equipment connected to the telephone line,
ensure the installation of this system does
not disable your alarm equipment. If you
have questions about what will disable alarm
equipment, consult your telephone company
or a qualified installer.
S
train
R
elief
Heavy Duty Wall Phone
with Caller ID/Call Waiting ID
!
IMPORTANT
!
If an icon appears at the end of a paragraph, go to the box on that page with the corresponding icon
for pertinent information.
Ô —Note