


43-3101 OWNER’S MANUAL — Please read before using this equipment.
©
2001 RadioShack Corporation. All Rights Reserved.
RadioShack and RadioShack.com are trademarks
used by RadioShack Corporation.
Indoor/Outdoor Modular Intercom System
Your Indoor/Outdoor Modular Intercom
System operates as a two-tone doorbell
intercom and an indoor intercom. The
doorbell is simple to install without wiring and
you can add additional stations.
PREPARATION
Installing the Doorbell’s Batteries
Your doorbell intercom uses four AA
batteries (not supplied) for power. For the
best performance and longest life, we
recommend RadioShack alkaline batteries.
Caution:
Use only fresh batteries of the
required size and recommended type. Do not
mix old and new batteries, different types of
batteries (standard, alkaline, or
rechargeable), or rechargeable batteries of
different capacities.
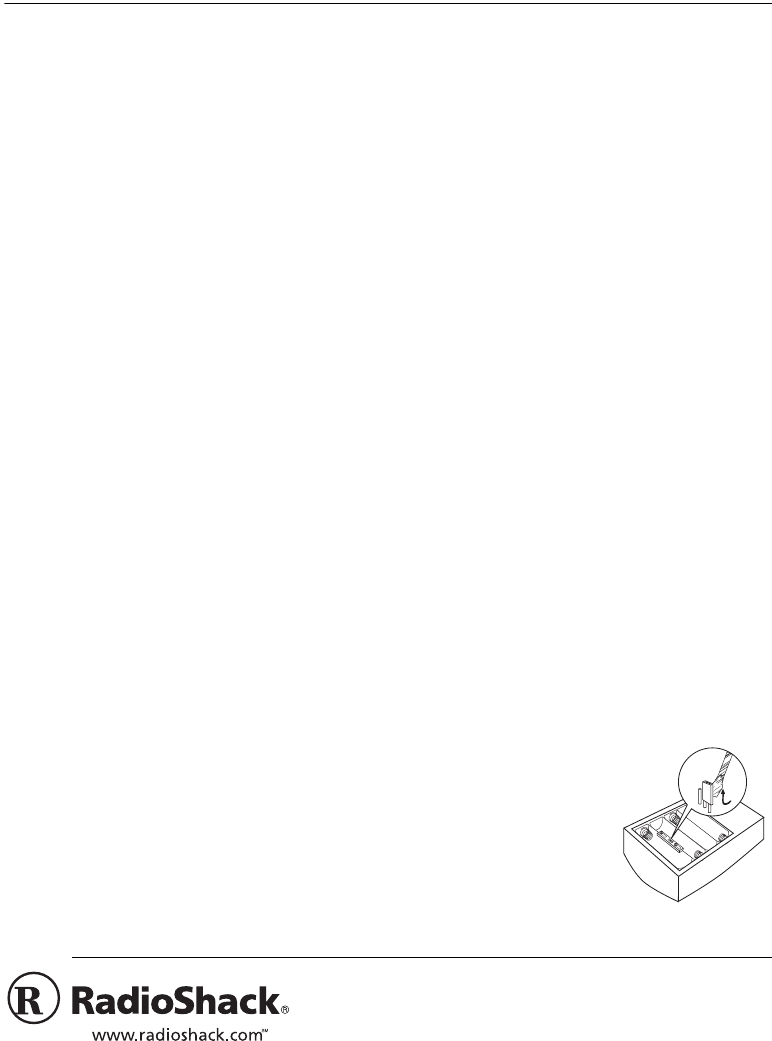
1. Use a Phillips screwdriver to loosen the
screws in the doorbell intercom’s battery
compartment cover, then lift the cover
off.
2. Insert four AA batteries into the
compartment as indicated by the polarity
symbols (
+
and
–
) marked inside.
3. Replace the cover and tighten the
screws.
Hint:
For convenience, set the channel
(see “Setting the Channel”) while you
have the battery cover removed.
Replace the batteries when the battery level
is low and the doorbell sends an alert tone to
the indoor intercom. The POWER indicator
on the indoor intercom flashes until you
replace the batteries.
Warning:
Dispose of old batteries promptly
and properly. Do not burn or bury them.
Caution:
If you do not plan to use the
doorbell for two weeks or longer, remove the
batteries. Batteries can leak chemicals that
can destroy electronic parts.
If the doorbell unit operates under severe
cold weather, use a lithuim type AA battery.
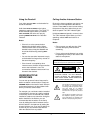
Setting the Channel
The doorbell and indoor intercoms have
three selectable operation channels to
prevent interference from similar products
nearby. Select the same channel for both the
doorbell intercom and the indoor intercom.
On the doorbell intercom, slide
CH
inside the
battery compartment to
1
(49.835MHz),
2
(49.860MHz), or
3
(49.885MHz).
On the back of the indoor intercom, set
OUTDOOR
CHANNEL
to the same channel
number (
1
,
2
or
3
) you chose for the doorbell
intercom.
Note:
If the doorbell occasionally sounds
without anyone pressing
BELL
on the
doorbell, change the channel settings.
Changing the Doorbell’s Tone
Use a small flat-blade
screwdriver to
carefully pull out the
jumper
TONE
switch
located in the battery
compartment, then
insert the jumper
TONE
switch into the other
two pins.