


iPronto is now ready for use
This is the layout that contains
the EPG application.
The status tab gives
you an overview of all
the system settings.
When you tap and hold
this View Control button,
the EPG flipside appears.
Here you can check the
signal strength of your
iPronto.
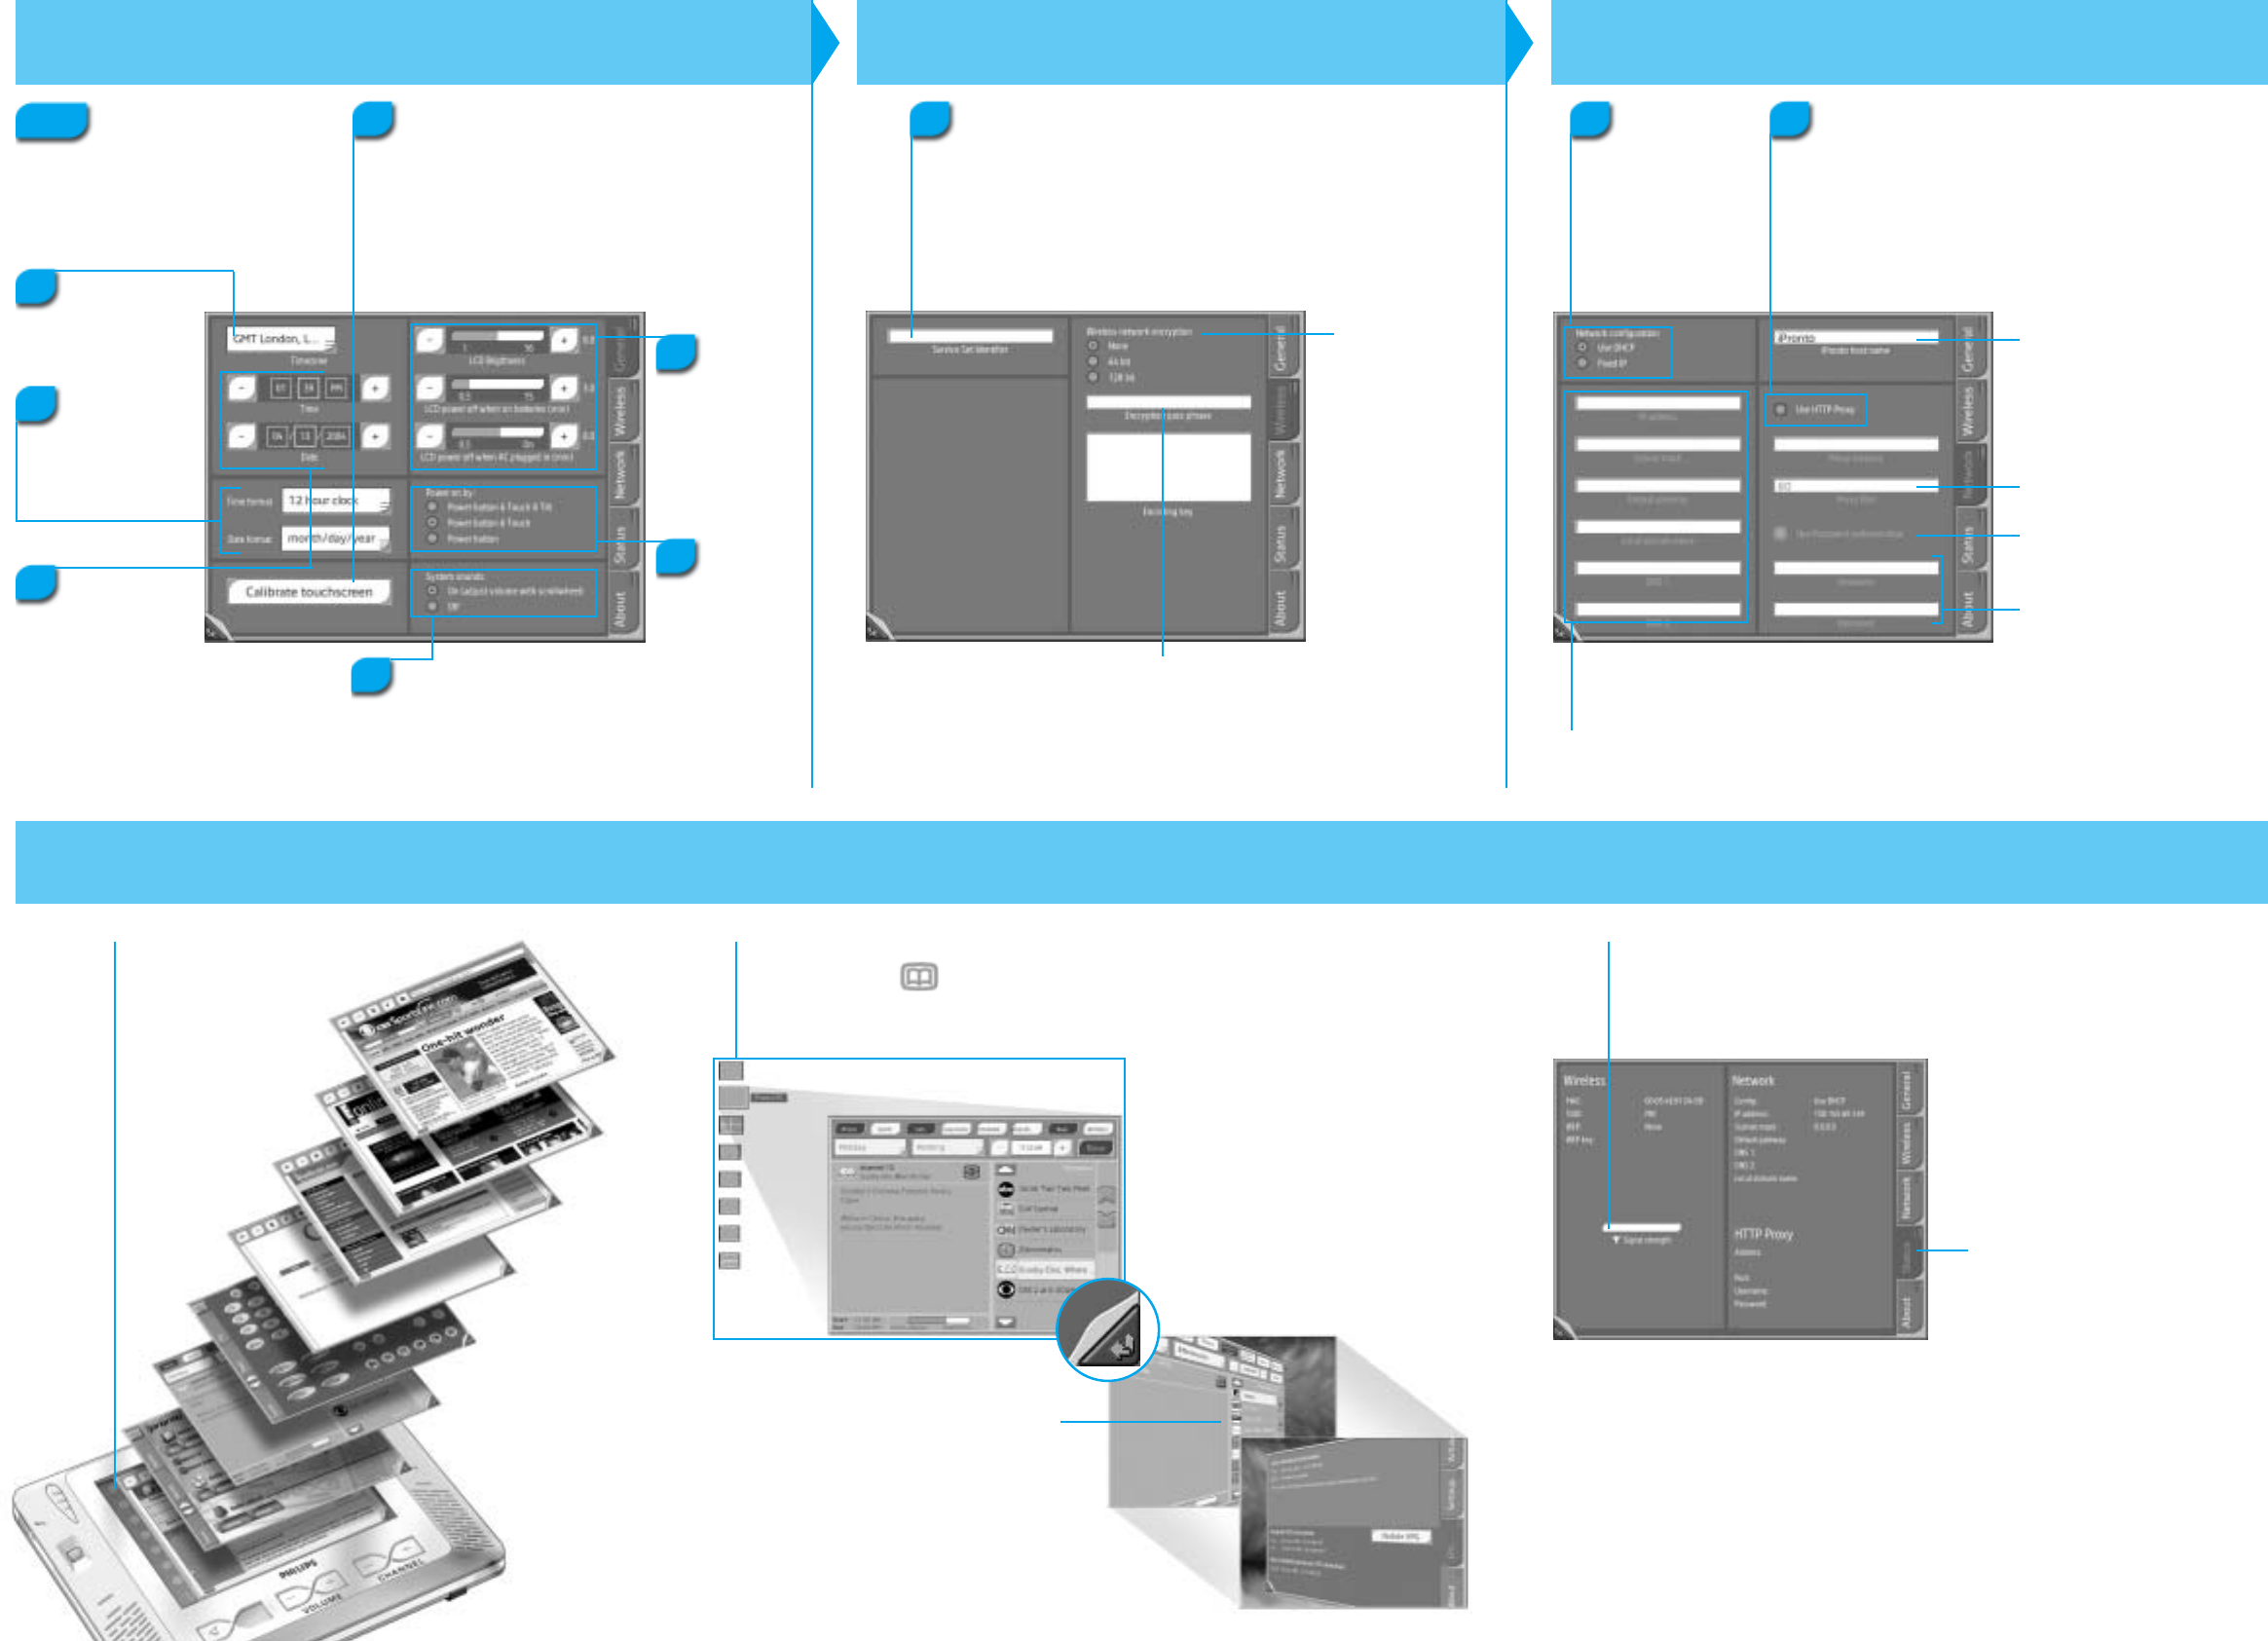
Set the Network Settings
To create a personal
name for your iPronto,
enter a name here.
Select one of these
Network Configuration
options.
When you have selected DHCP, these text boxes are
automatically filled in. When you have selected
Fixed IP, you have to fill these text boxes in manually.
If you use a Proxy, enter
your Proxy Port here.
If your Proxy uses Password
Authentication, enter your
Username and Password here.
If your Proxy uses Password
Authentication, select this option.
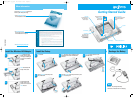
Set the General Settings
1
2
5
3
Tap this button and follow the
instructions on the screen.
When calibration has succeeded,
you hear a success sound.
Note
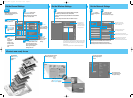
Set the Wireless Settings
Check whether the Service Set Identifier (SSID) corresponds
to the SSID of your Wireless Access Point (WAP).
By default, the iPronto displays the SSID of the nearest WAP it
can detect.
If needed, change the default name of the SSID in this box.
If encryption is
enabled in your
wireless network,
select the correct
encryption here.
If encryption is enabled in your wireless network, enter
your Encryption pass phrase here. The Encryption pass
phrase must be the identical to your WAP’s Encryption
pass phrase.
The Encoding key text box is automatically filled in.
8
Use the + and
– buttons to adjust
the brightness and
power off settings.
6
Select one of
these three
options to adjust
the power on
settings.
9
Check whether your home
network or your Internet
Service Provider uses a proxy.
10
Switch the System sounds on
or off. System sounds are the
sounds that you hear when
you tap a button on the touch
screen, go to the System
Settings, and so on.
The first time you activate your
iPronto, the System Settings will
automatically appear.
Use the buttons
on this touchstrip
to access a
layout.
Select your
timezone from this
dropdown list.
4
7
Select the box
that you want to
modify.
The text box is
highlighted.
Use the + and –
buttons to adjust
the time and the
date.
Select the desired
Time format and
Date format from
these dropdown
lists.
iPronto QSG E v1_6.qxd 20-04-2004 14:07 Pagina 2