


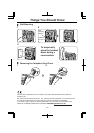
Confirming the Mode
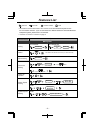
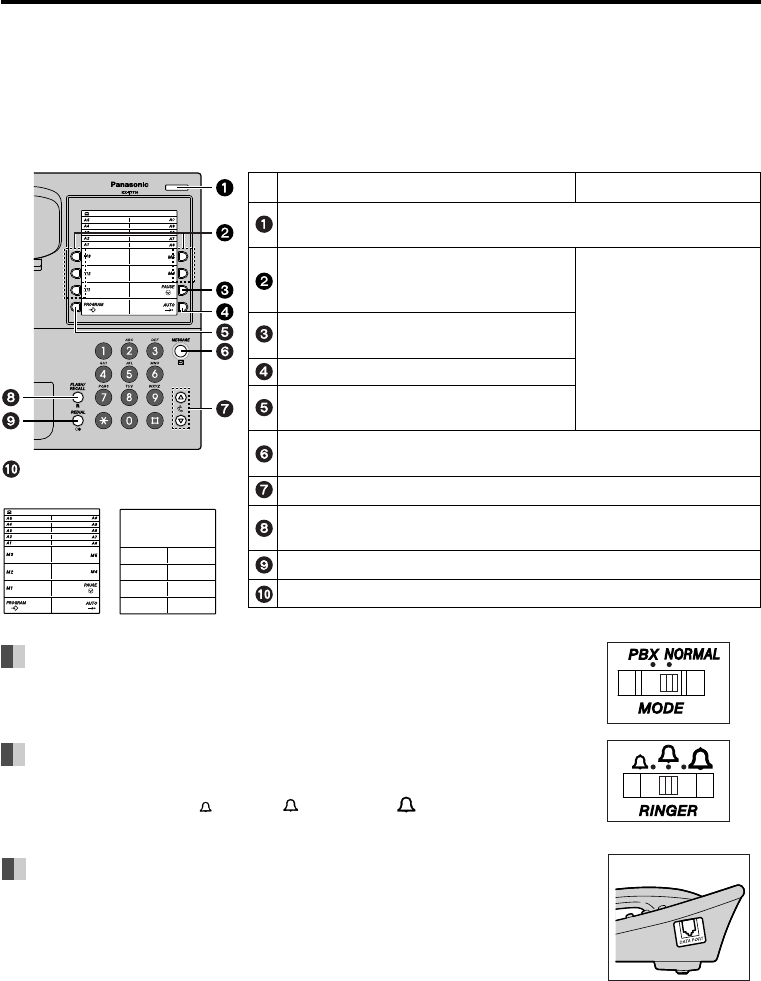
Adjusting the RINGER Volume
Adjust the RINGER volume selector lever (at the bottom of the unit) to
the desired setting. ( – LOW, – MIDDLE, – HIGH)
[Default: MIDDLE]
You can confirm the current mode by the position of the Mode switch
lever (at the bottom of the unit). [Default: NORMAL]
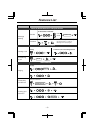
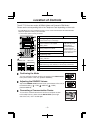
PAUSE: Used to insert a pause when
storing a telephone number.
AUTO: Used for Station Speed dialling.
PROGRAM: Used to enter the
programming mode.
MESSAGE: Used to call back the party who left the message
waiting indication.
Handset Volume Control Buttons: Used to adjust the handset volume.
One-touch Buttons (M1-M5): Used to
access a feature or as a speed
dialling button.
FLASH/RECALL: Used to send a recall signal in order to access a
PBX feature (eg., Hold, Transfer, or Three-party Conference).
REDIAL: Used to redial the last dialled number.
8
7
6
5
4
3
2
1
PBX mode
NORMAL mode
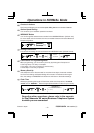
Connecting a Communication Device
Telephone Card: Has two sides (NORMAL mode, PBX mode).
DATA PORT
To connect a communication device such as a computer modem
to the telephone line, please use the DATA PORT (at the right
side of the unit). RJ11 modular jack.
PBX ModeNORMAL Mode
Message/Ringer Lamp: Flashes when you receive a call or when
someone has left you a message.
One-touch Buttons
(1-8): Used as preset
feature buttons
set at the
Panasonic
KX series Business
Telephone System
; you
do not need to program
at your extension.
The KX-T7710 has two modes, NORMAL Mode and Panasonic PBX Mode*.
Please use the corresponding side of the Telephone Card depending on the mode.
*The PBX Mode may not be available depending on the model of the Panasonic KX series Business
Telephone Systems to which you are connected.
For more detail, please consult your dealer.
Location of Controls
– 5 –