


OWNER’S MANUAL FOR THE F-10 (FRS)
http://www.midlandradio.com Page 4 of 12
TIPS FOR GETTING THE MOST FROM YOUR F-10
Due to the band of operation (462/467 MHz) the F-10 provides communications that are virtually
free of atmospheric interference (skip) that is common on lower frequency bands. Along with this
and an antenna system that is very efficient as compared to other unlicensed radio bands,
communications range is surprisingly good. Many times the limits to maximum possible range are
environmental factors such as blockage caused by trees, buildings, hills, or other obstructions. If
you find communication is not possible, many times this can be overcome by moving only a few
feet to a new location. Range may be reduced while operating in a vehicle or from inside to
outside a metal building. Battery condition also affects range. The F-10 operates best on alkaline
batteries. This unit is a precision piece of electronic equipment that should not be exposed to
water or handled carelessly. Normal care should result in years of trouble free operation. Do not
leave batteries installed over a long period of time as leakage may occur that can destroy the
radio. Always save your receipt, as it is required for warranty consideration.
PREPARATION
BATTERIES:
F-10 radios operate with 3 AAA Alkaline, Ni-Cad (nickel cadmium) or Ni-MH (nickel metal
hydride) batteries (optional) or a Ni-MH battery pack. Ni-Cad batteries provide about 7 hours of
use. Alkaline batteries will provide about 20 hours of use and Ni-MH batteries will provide about
14 hours of use. Ni-Cad and Ni-MH batteries must
be charged prior to use. Charge NI-Cad or Ni-
MH batteries at least 10 hours. DO NOT
attempt to charge any type of Alkaline batteries in
this radio.
Installing Batteries:
Hold the radio face down. Press the latch so it swings away from the cover.
1. Lift the battery cover slightly. Gently slide the cover off the unit.
2. Insert 3 AAA batteries observing the proper polarity. If a battery pack is used, observe the up
arrow is visible and pointing toward the top of the radio.
3. Replace the battery cover over the batteries and fasten with the latch.
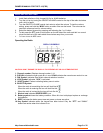
Low Battery Indicator:
The battery icon in the lower left of the display will flash when the batteries are in need of
charging.
Instructions for optional charger
Install NI-MH (nickel metal-hydride) observing their polarity. Plug the power adapter for the 18-
F10 charger into any 110/115 V wall socket. Insert the radio into the charging stand with the front
facing you and observe that the LED on the charger is lit. Charge the batteries for at least 10
hours for Ni-MH. The radio should be turned off while charging. For charging with optional wall
charger observe instructions supplied with the charger.
DO NOT
attempt to charge any type of Alkaline batteries in this radio.