


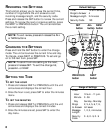
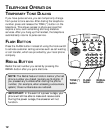
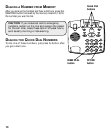

6
1
ABC
2
DEF
3
GHI
4
JKL
5
MNO
6
PQRS
7
TUV
8
WXYZ
9
*
OPER
0
#
TONE
MEM DIAL
STORE
FLASH
REDIAL
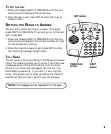
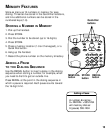
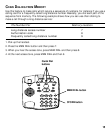
TAPELESS MESSAGE SYSTEM
PLAY / STOP
NEXTPREVIOUS
2 WAY/MEMO
ON/OFF
SET
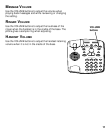
VOLUME
+
_
NEWALL
ERASE
1
2
3
4
5
6
7
8
9
MIC
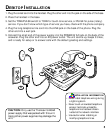
CAUTION: Only use the
Thomson 5-2434A power supply
that was packed with this unit.
Using other power supplies may
damage the unit.
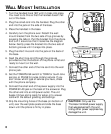
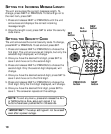
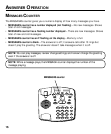
WALL MOUNT INSTALLATION
1. Turn the handset hook 180º until it clicks into place.
You need to do this so that the handset doesn’t fall
out of the base.
2. Plug the coiled cord into the handset. Plug the other
end into the jack on the side of the base.
3. Place the handset in the base.
4. Carefully turn the phone over. Detach the wall
mount bracket from the two sets of top grooves by
pressing the tabs in. Pull the bracket from the phone
and turn it around so that it looks like the diagram
below. Gently press the bracket into the two sets of
bottom grooves until it snaps into place.
5. Plug the short line cord into the jack on the back of
the base.
6. Feed the short line cord through the grooves
provided so that the bottom of the phone is flat and
ready to mount on the wall.
7. Connect the other end of the line cord into the wall
phone jack.
8. Set the TONE/PULSE switch to TONE for touch-tone
service, or PULSE for pulse (rotary) service. If you
don’t know which type of service you have, check
with the phone company.
9. Connect the small end of the power supply into the
POWER 9V AC jack on the back of the answerer. Plug
the other end into an AC power outlet. The unit
beeps 3 times and is ready for setup or to answer
calls with the default greeting and settings.
10. Slip the mounting holes of the base (on bottom of
unit) over the wall plate posts and slide the base
down until the phone is firmly in place.