


• CASIO COMPUTER CO., LTD. assumes no responsibility for any damage or loss resulting
from the use of this manual.
• CASIO COMPUTER CO., LTD. assumes no responsibility for any loss or claims by third
parties which may arise through the use of this product.
• CASIO COMPUTER CO., LTD. assumes no responsibility for any damage or loss caused
by deletion of data as a result of malfunction, repairs, or battery replacement. Be sure to
back up all important data on other media to protect against its loss.
• Data can be uploaded from this unit to a personal computer for storage on a hard disk,
floppy diskette, or other storage medium. Be sure to make multiple copies of all important
data to protect against its accidental loss.
• The contents of this manual are subject to change without notice.
• No part of this manual may be reproduced in any form without the express written consent
of the manufacturer.
• Sample displays shown in this manual may differ somewhat from the displays actually
produced by the product.
©2000 CASIO COMPUTER CO., LTD. All rights reserved.
Copyright Information
• Microsoft, ActiveSync, Outlook, Pocket Outlook, Expedia, AutoRoute Express, MapPoint,
Windows, Windows NT, and the Windows logo are either registered trademarks or trademarks
of Microsoft Corporation in the United States and/or other countries. Microsoft products are
licensed to OEMs by Microsoft Licensing, Inc., a wholly owned subsidiary of Microsoft
Corporation.
• CompactFlash is a registered trademark of SanDisk Corporation.
• All other product and company names mentioned herein may be the trademarks of their
respective owners.
Tap to select an input method or change options.
USB port
CASSIOPIEA USB cable
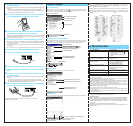
Tap to customize this screen.
Tap to open an item.
Tap to switch to a program.
Your day at a glance
Tap to change the date and time.
Status icons
Tap to create a new item.
Tap to close the screen.
Tap to select a program.
Tap to see additional programs.
Tap to customize the device.
Starting up an application from the menu
causes its icon to appear here. Up to six
applications can be displayed. You can make
an application active by tapping its icon.
Menu names
Input panel buttonNew button
Buttons
Tap outside the menu to close it
without performing an action.
Tap and hold to display the pop-up menu.
Lift the stylus and tap the action you want.
See this source:
•
Pocket PC User’s Guide
.
• Device Help. To view Help, tap
and then Help.
• Manuals on the CASSIOPEIA CD-
ROM
The Extras folder, located on the
ActiveSync CD.
The ActiveSync booklet or ActiveSync
Help on your desktop computer. To
view Help, click Help and then
Microsoft ActiveSync Help.
The Readme files, located in the
Microsoft ActiveSync folder on the
desktop computer and on the
ActiveSync CD.
http://www.microsoft.com/windowsce/
Hardware Manual
For information on:
Programs on your CASSIOPEIA
Additional programs that can be
installed on your CASSIOPEIA
Connecting to and synchronizing with a
desktop computer
Last-minute updates and detailed
technical information
Up-to-date information on Windows-
powered devices
CASSIOPEIA Hardware information
4 Follow the instructions that appear on your computer screen
to install ActiveSync.
• What happens next depends on whether your computer already has Windows CE Services
installed.
◊ In most cases, the “Get Connected” dialog appears after ActiveSync is installed.
◊ The “Get Connected” dialog does not appear if your computer already has Windows CE
Services installed. Click [Finish] and advance to the next step.
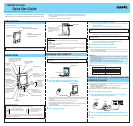
5 Turn off your CASSIOPEIA and place it onto the cradle. Make
sure the CASSIOPEIA seats securely onto the cradle.
6 ActiveSync automatically locates the port where CASSIOPEIA
is connected and configures the communication port.
• Depending on how the CASSIOPEIA is connected to your computer, you may be required
to click the [Next] button before ActiveSync starts the above step. Follow the instructions
that appear on your computer screen.
7 Use the dialog that appears to make the settings you want.
• At this point, if you want to continue working with your CASSIOPEIA, see the
Pocket PC
User’s Guide
and online help for guidance. Otherwise, turn off CASSIOPEIA power and
remove it from the cradle.
• For more information on installing ActiveSync, see the booklet accompanying the
ActiveSync CD.
• For information on how to transfer Palm-size PC data, see the
Pocket PC User’s Guide
.
Installing ActiveSync Using the CASSIOPEIA USB Cable
1 Connect the CASSIOPEA USB cable to your computer
2 Turn on your desktop computer and wait as Windows starts up.
3 Insert the ActiveSync CD-ROM into your computer’s CD-ROM
drive.
4 Follow the instructions that appear on your computer screen
to install ActiveSync.
• What happens next depends on whether your computer already has Windows CE Services
installed.
◊ In most cases, the “Get Connected” dialog appears after ActiveSync is installed.
◊ The “Get Connected” dialog does not appear if your computer already has Windows CE
Services installed. Click [Finish] and advance to the next step.
5 After turning off your CASSIOPIEA, connect the CASSIOPEIA
to your computer as shown in the illustration.
The remainder of this procedure is identical to steps 6 and 7 under Installing
ActiveSync Using the Cradle.
Pocket PC Basics
The Today Screen
When you turn on your device for the first time each day (or after 4 hours of inactivity), you’ll see
the Today screen. You can also display it by tapping
and then Today. On the Today screen,
you can see at a glance the information you need for the day.
Navigation Bar and Command Bar
The navigation bar is located at the top of the screen. It displays the active program and current
time, and allows you to switch to programs and close screens. The command bar is displayed
at the bottom of the screen. Use the menus and buttons to perform tasks in programs.
Pop-up Menus
With pop-up menus, you can quickly choose an action for an item.
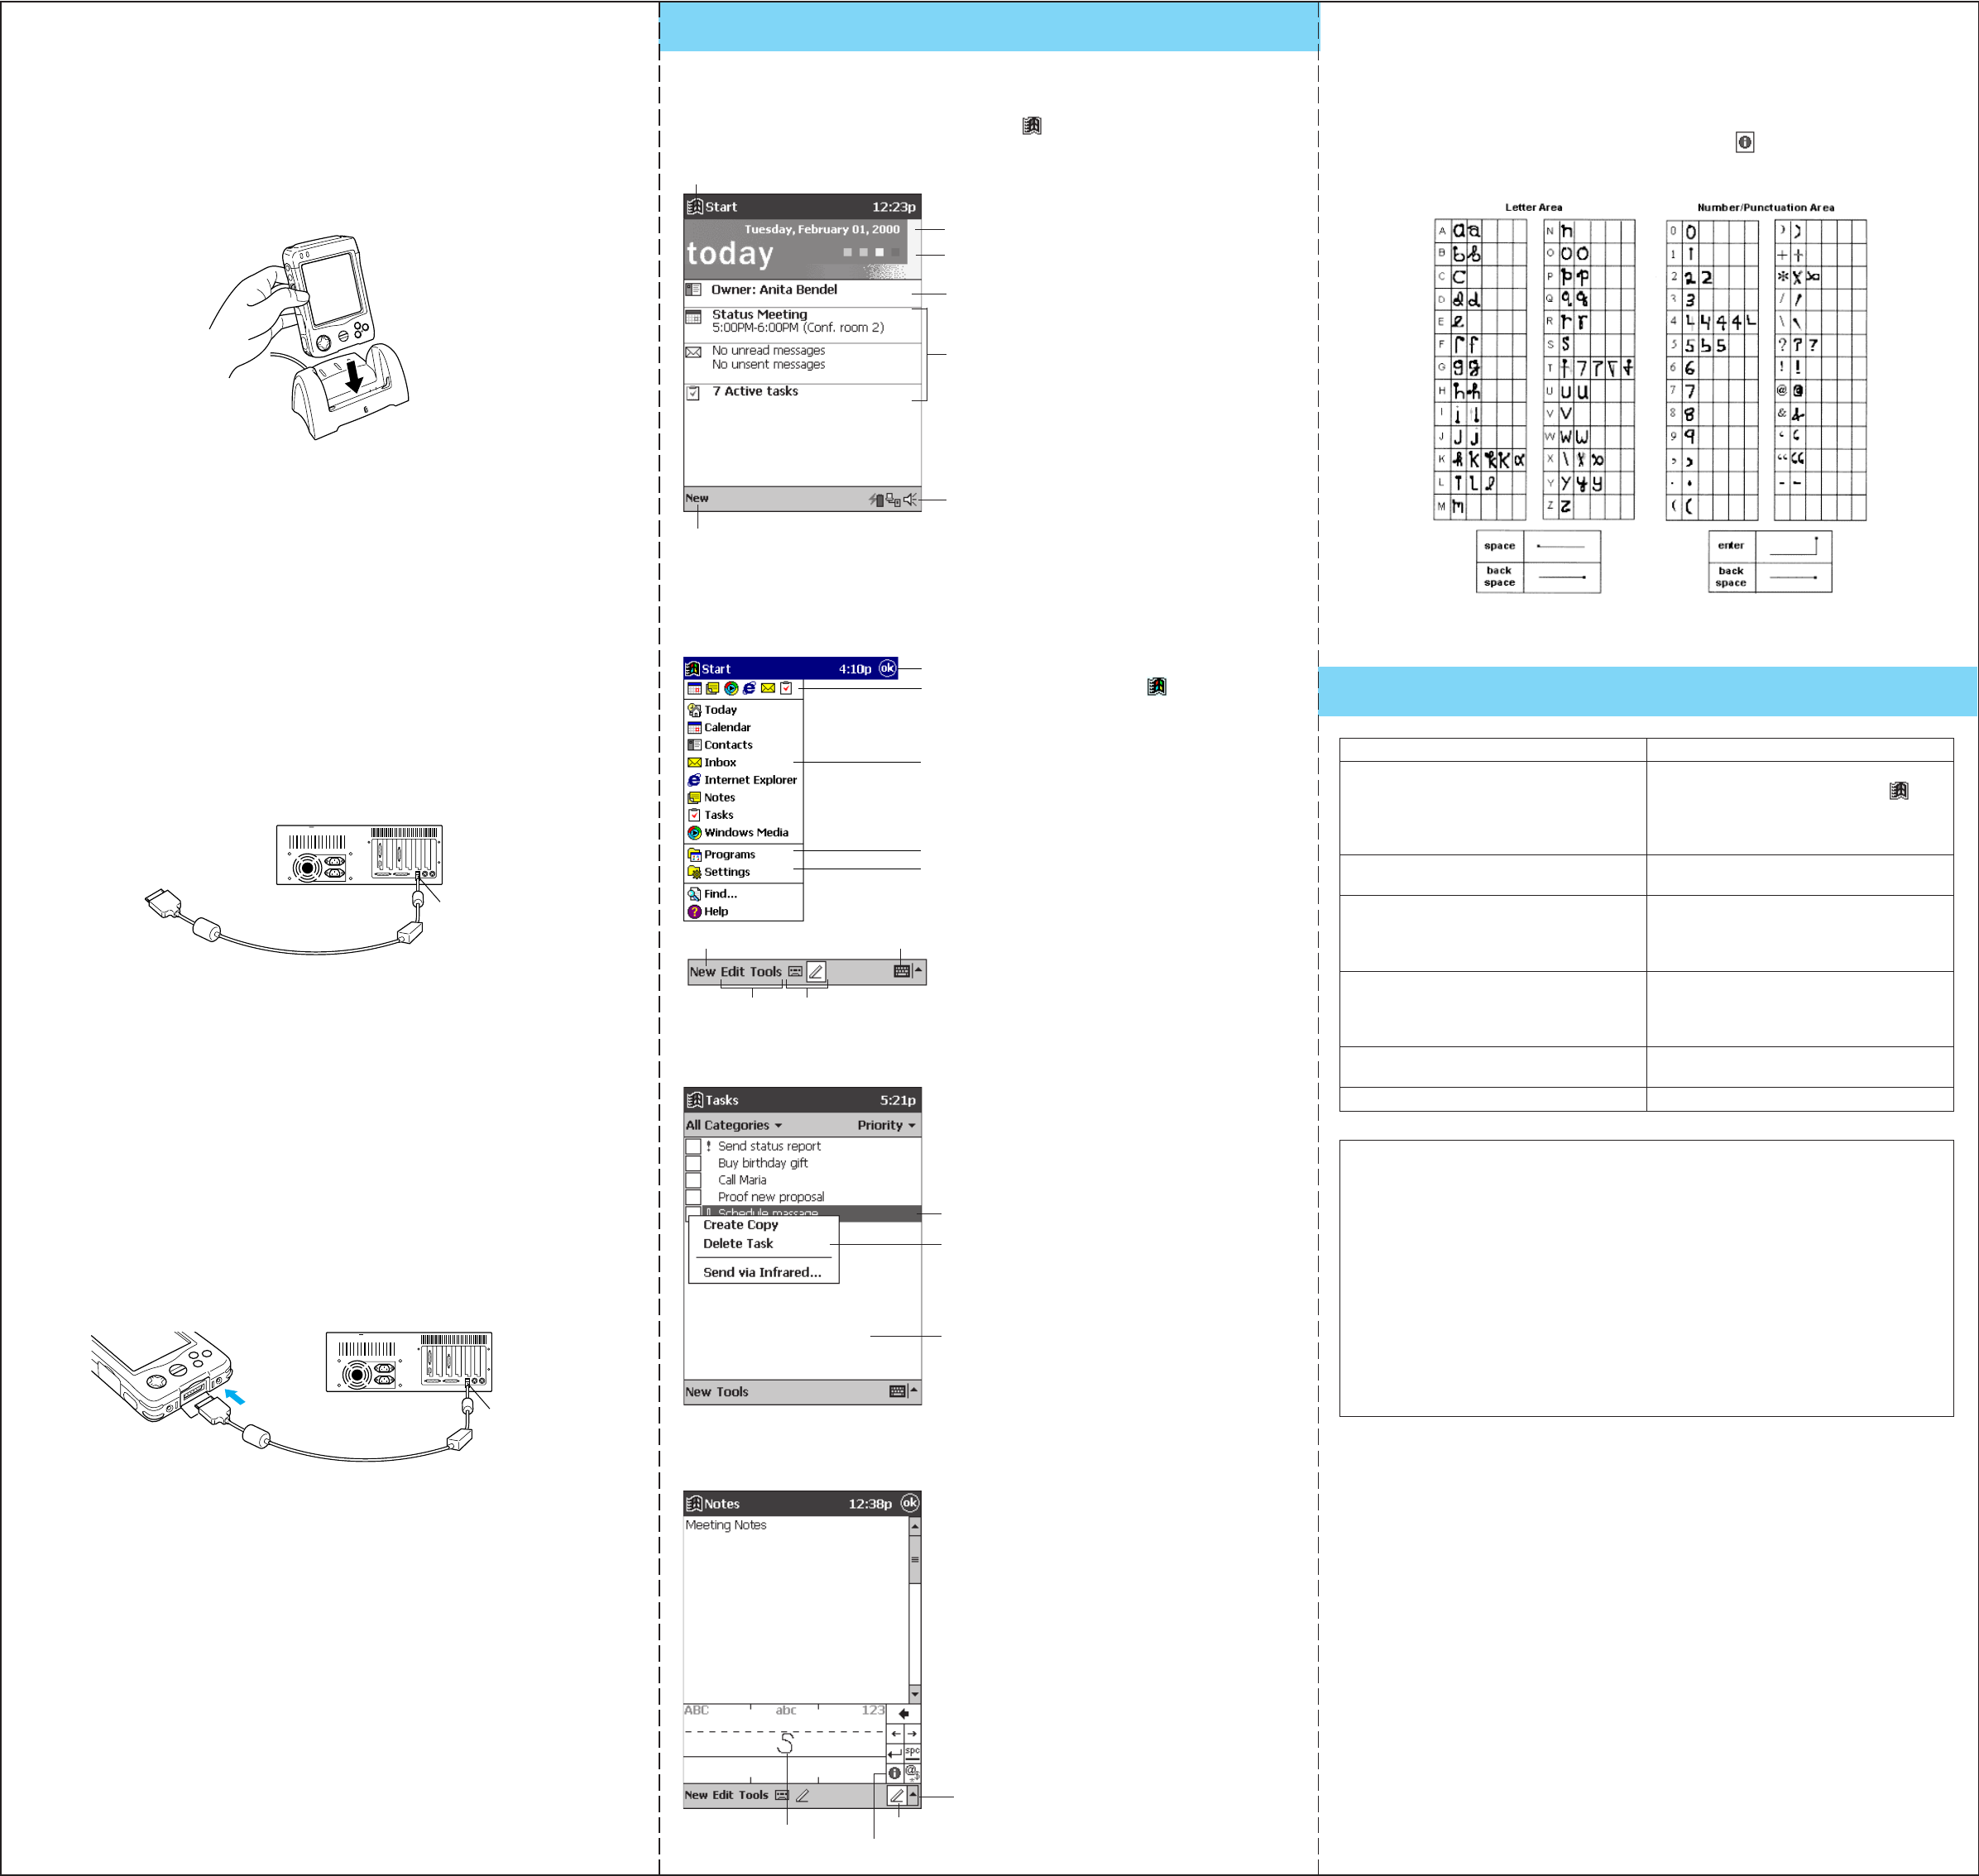
Input Methods
You can enter information in any program on your Pocket PC by typing with the software keyboard
or writing using Character Recognizer.
The Character Recognizer input panel is divided into three writing areas. Letters written in the
left area (labeled ABC) will create uppercase letters and letters written in the middle area
(labeled abc) will create lowercase letters. The right area (labeled 123) is for writing numbers,
symbols, special characters, and punctuation.
The following chart is a partial display of the characters you can write while in lowercase mode
(the dot on each character is the starting point for writing). For more information on using
Character Recognizer and for demos of all characters, tap
on the Character Recognizer
input panel.
For More Information
USB port
CASSIOPIEA USB cable
Tap to show or hide the input panel.
Tap to see how to write letters.
The letter you write is
converted to typed text that
appears on the screen.