


March 2006 Revision: 1 16-600797 1
Avaya one-X™ Quick Edition
Telephone Quick Installation Guide
Installing a 4610SW/4621SW IP Telephone
This document contains a summarized (four-step) installation procedure. For
detailed step-by-step procedures, including variants of this procedure, refer to the
Avaya one-X Quick Edition Telephone User Guide.
1
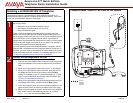
Unpack the equipment from the shipping box. The package should contain
the following items:
• one telephone set (includes a telephone stand),
• one Category 5 (Cat5) modular line cord, and
• this quick installation guide.
Power is typically supplied to the telephone by connecting the Cat5
modular line cord to a 802.3af PoE-enabled Ethernet LAN. Option A on
the facing page shows a wall jack, but you could connect the Cat5 modular
line cord directly to a PoE-enabled Ethernet switch. If your Ethernet
network does not provide 802.3af-compliant inline power, you must supply
a PoE inline power supply (see Option B on next page). The last step in
installing your telephone must be applying power.
You may optionally connect the telephone between a computer and the
Ethernet LAN—the telephone and the computer share the connection. In
this case, you must supply a second Cat5 (or better) modular line cord to
connect the telephone to the computer. For installation instructions, see
‘‘To share the telephone LAN connection with a computer’’.
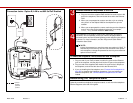
2
Connect the first telephone to the LAN
1. Plug one end of the supplied Cat5 modular line cord into the LAN
port on the telephone and connect the other end to the Ethernet
LAN.
2. When you are prompted to create a site, press 1 on the dialpad.
3. When you are prompted to enter a site name, press the keys on
the dialpad to enter the site name, and then select the Next
softkey. For example, to type “R”, press the dialpad key “7” three
times. For more information about how to enter characters, see
‘‘Entering Text and Special Characters’’.
4. When you are prompted to change the default password (wait for
the prompt), enter 54321, and then select the Next softkey.
5. Follow the prompts to enter and confirm a different password. The
password must contain at least five numbers in the 0 to 9 range.
6. When you are prompted for a name, use the keys on the dialpad to
enter a user name for the telephone extension (for example,
Smith, Pat), and then select the Save softkey.
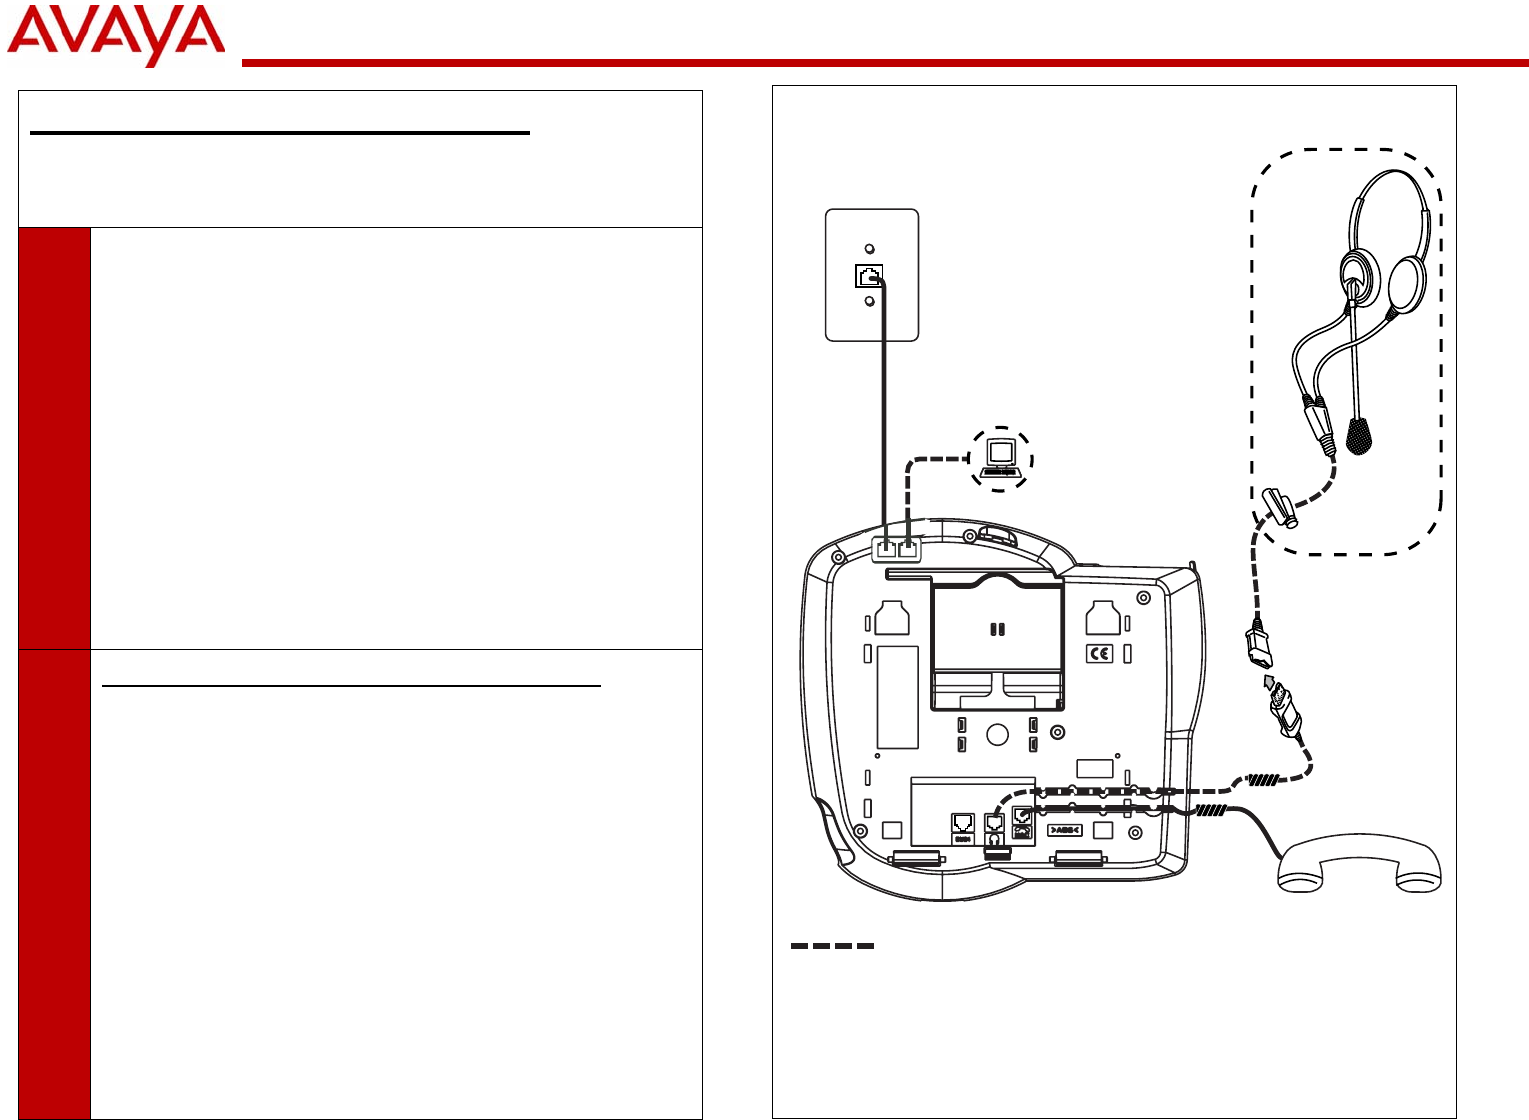
Connection Jacks - Option A, LAN is 802.3af PoE Enabled
optional
facultatif
optionale
opcional
=