


INSTALLATION
NOTE: This telephone requires a
modular telephone jack.
Table
If you have a wall-mounted telephone,
remove the telephone from the wall
and follow these instructions:
1 Remove the base.
2 Connect line cord to telephone.
Plug the seven-foot line cord into
the LINE jack on the bottom of
the telephone.
3 Attach the base.
Turn the base so that the larger
end of the base is toward the top
of the telephone. Attach the base
by inserting the tabs into the slots.
Push down on the large end of the
base to lock it into place.
4 Connect the line cord to your
modular jack.
Plug the free end of the line cord
into a modular jack. Make sure it
snaps firmly into place.
5 Connect handset to telephone.
Plug the coiled cord into the hand-
set jack on the side of the phone.
Plug the other end of the coiled
cord into the handset, and then
hang up.
6 Check for dial tone.
Lift the handset and listen for
a dial tone. If you cannot hear
a dial tone, turn to “In Case of
Difficulty.”
Wall
1 Remove the base.
2 Connect the line cord to
telephone.
Do not unbundle line cord. Plug
the seven-foot line cord into the
LINE jack on the underside of the
phone. Leave enough cord free to
connect to the wall jack, but keep
any excess cord unbundled. Store
the bundled cord in the open area
under the set.
3 Attach the base.
Turn the base so that the larger
end of the base is toward the bot-
tom of the telephone. Attach the
base by inserting the tabs into the
slots. Push down on the large end
of the base to lock it into place.
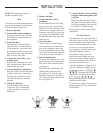
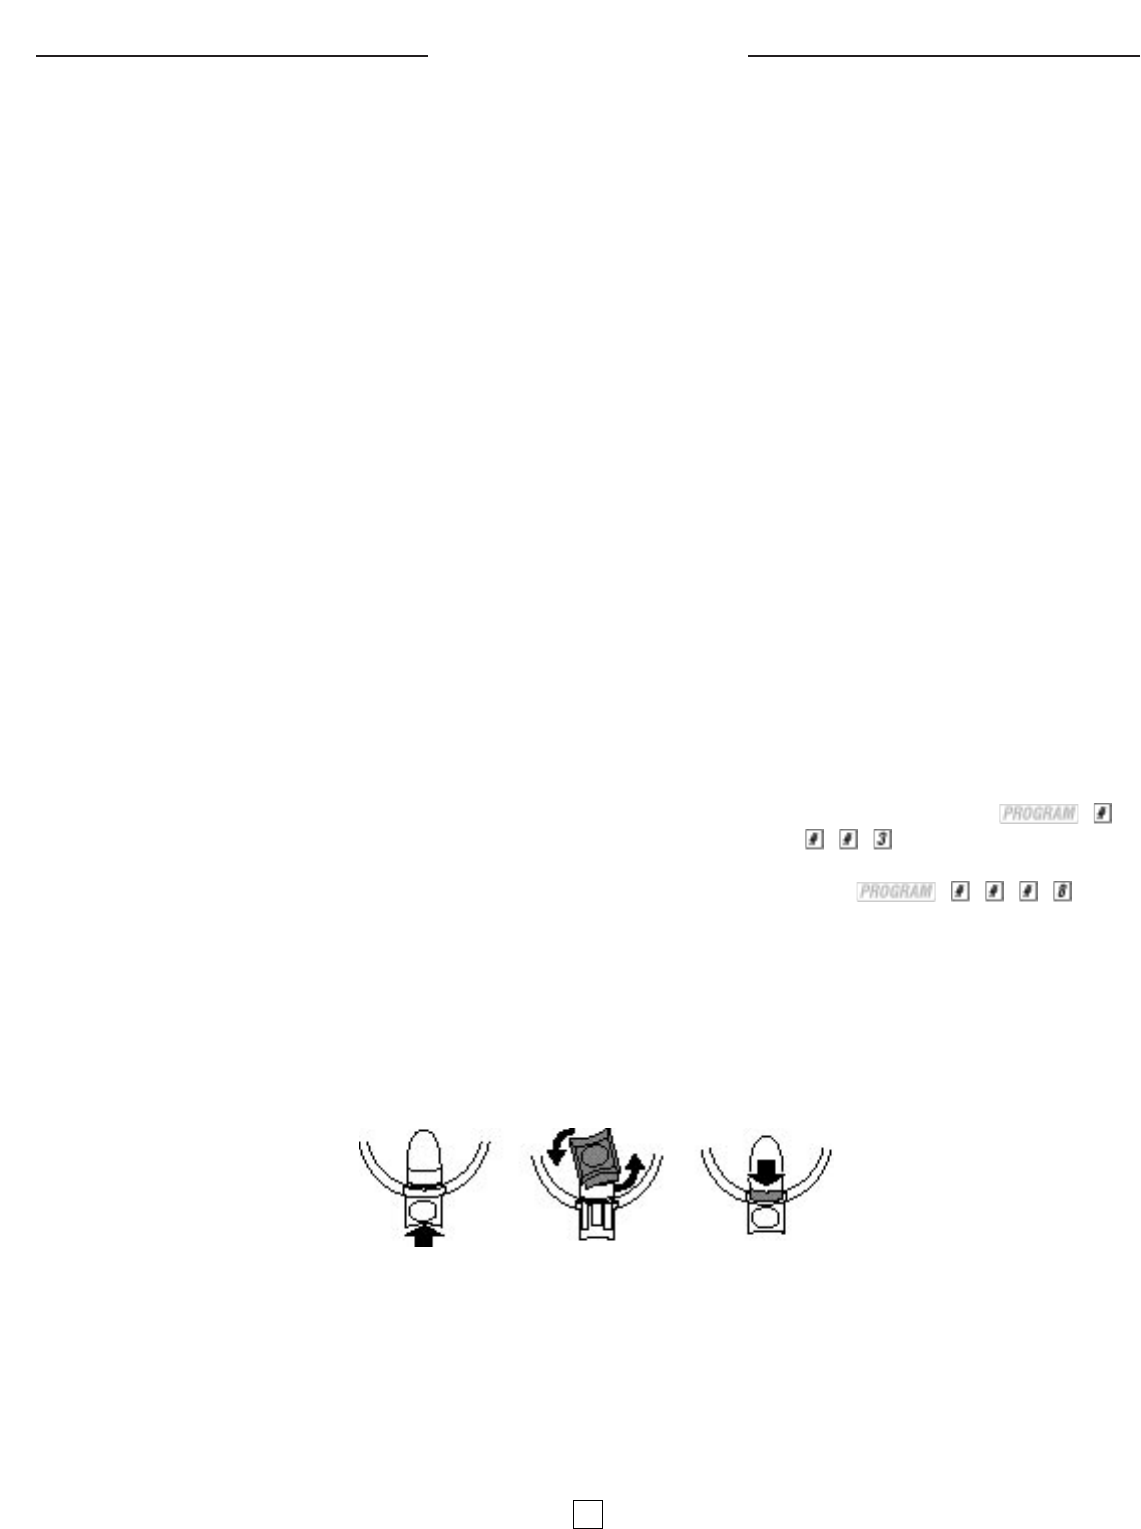
4 Reverse handset tab.
To mount the telephone on a wall,
you must reverse the handset tab.
This tab holds the handset when
you hang up.
Hold down the switchhook, and
slide the tab up and out of its
slot (Figure 1A). Turn the tab so
that the curved end is up (Figure
1B). Then insert the tab back into
its slot (Figure 1C).
5 Connect the line cord to modular
wall jack and mount phone onto
wall jack.
Make sure the cord snaps firmly
into place. Place the phone on the
wall jack mounting studs and pull
down until it is held securely.
Follow Steps 5 and 6 under “Table”
Installation.
Dial Mode Selection
This telephone will work with tone or
dial pulse (rotary) service. Even when
set to dial pulse service, the phone
can be switched temporarily to tone,
for access to services that require
tone signaling, including some tone-
activated computer systems.
This product comes set in the
touch-tone mode. Make sure you
choose the correct dialing method;
touch-tone dialing will not work if
you have dial pulse service.
After the telephone is plugged in, if
you have dial pulse (rotary) service,
lift handset and press , ,
, , . To change back to touch
tone service, lift the handset, then
press , , , , .
Hang the handset up for dial mode
selection to take effect.
To switch from pulse to tone dialing
during a phone call, see “Temporary
Tone Dialing.”
Figure 1A Figure 1B Figure 1C
1