


- 4 -
English
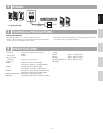
JK-DVF
ABC
3
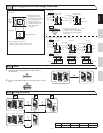
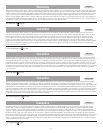
MOUNTING
JK-DA
Removing the
main unit from the
mounting frame
Place " UP" upwards
Remove the main unit.
(Loosen the locking screws.)
Screwdriver
Tighten Loosen
Main unit
Mounting
screws x 2
1-gang box
83.5 mm
(3-5/16")
Mounting frame
Drainage hole
Do not block the holes.
Front panel
Pry off the front panel with
a flathead screwdriver.
Flathead
screwdriver
Main unit
<Bottom surface>
Mount the main unit on
the mounting frame, and fit
the front panel on.
Removing the front panel
JK-DV
ABC
Special
screwdriver
Special
screwdriver
Loosen
Tighten
Tighten
Mounting
screws x 4
Vandal-resistant front panel
Vandal-resistant front panel
Flush mount
back box
Transparent
nameplate
75 mm
3''
110 mm
4-3/8''
180 mm
7-3/32''
45 mm
1-25/32''
150 mm
5-15/16''
Drainage hole
Do not block the holes.
Ø 6 mm
Ø 1/4"
35 mm
1-3/8"
Anchor bolts x 4
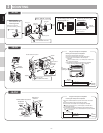
To
insertion
opening
To
insertion
opening
To
insertion
opening
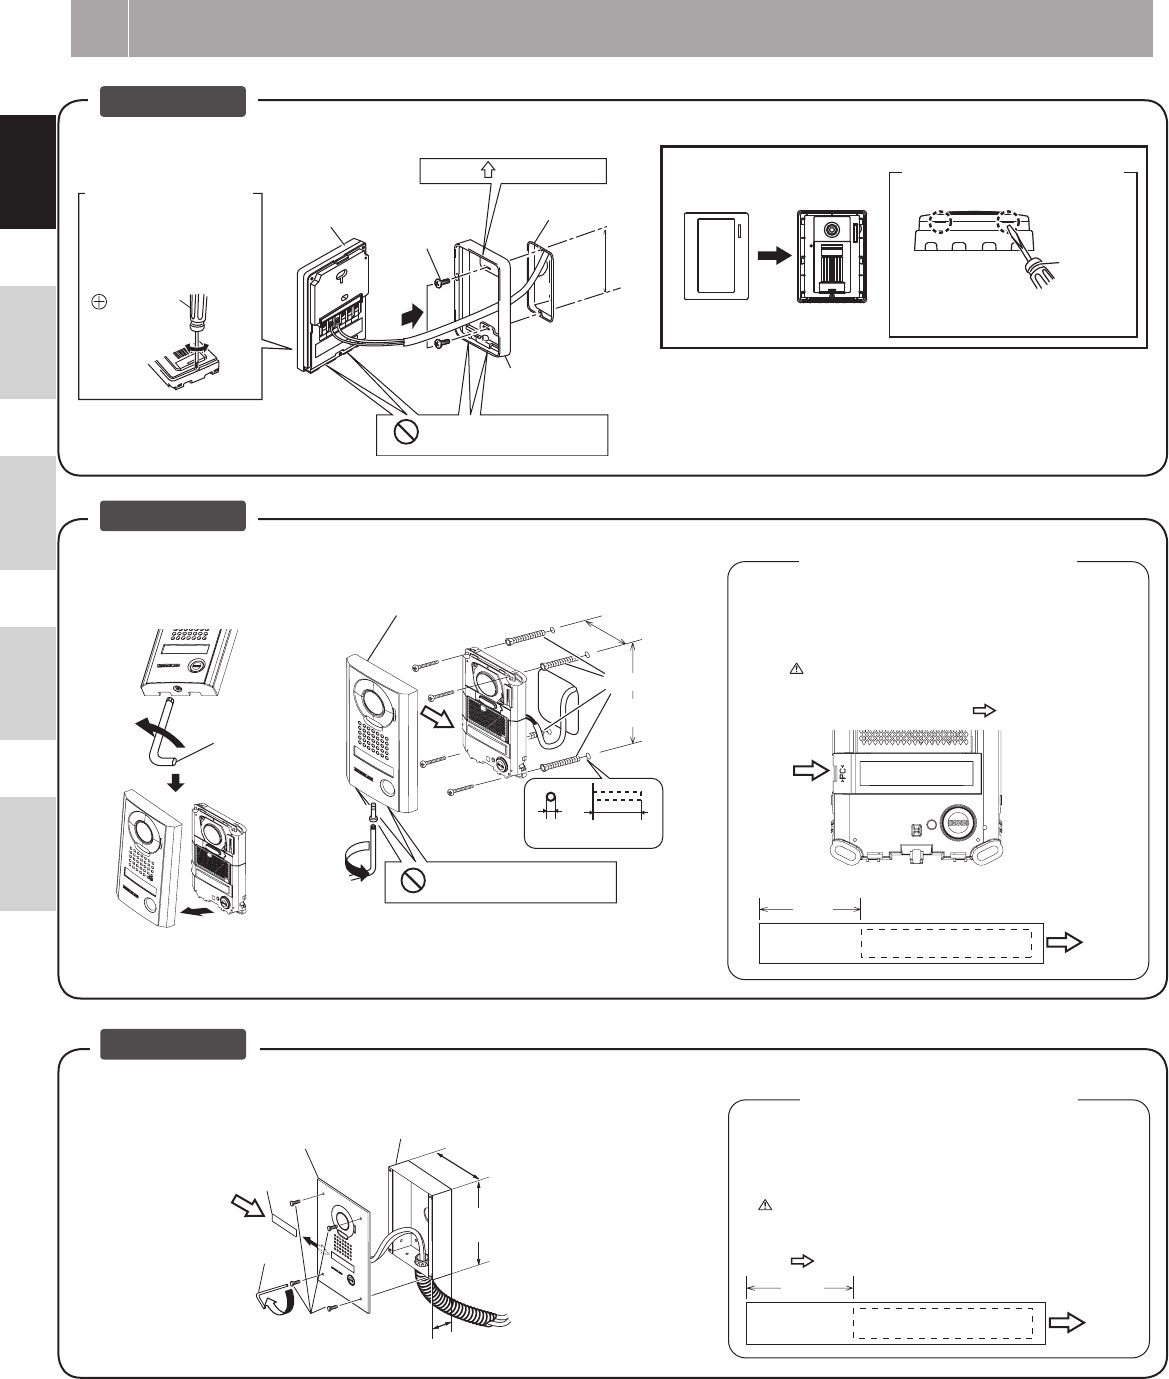
Using the transparent nameplates
Using the transparent nameplates
Inserting the transparent nameplates
Inserting the transparent nameplates
Remove the vandal-resistant front panel.
Peel off the protective seals on the plate (both sides).
Fill in the name of the resident on the transparent
nameplate.
Be sure to leave 25 mm (1") of white space on the left end
to account for insertion.
Insert the filled-in transparent nameplate at the specified
insertion opening (indicated with
in diagram).
Remove the vandal-resistant front panel from the flush mount back
box.
Peel off the protective seals on the plate (both sides).
Fill in the name of the resident on the transparent nameplate.
Be sure to leave 25 mm (1") of white space on the left end to
account for insertion.
Insert the filled-in transparent nameplate at the specified insertion
opening on the rear side of the vandal-resistant front panel (indicated
with
in diagram).
25 mm
1"
25 mm
1"