


13
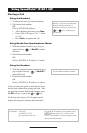
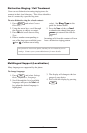
To add or edit a contact:
1. Press
Hold
Del
Sel
Conference
1 3
DEF
5
JKL
4
GHI
6
MNO
8
TUV
7
PQRS
9
WXYZ
0
OPER
*
#
2
ABC
Hold
Del
Sel
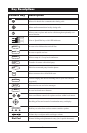
Directories
Services
Call Lists
Buddy Status
My Status
Redial
Menu
Messages
Do Not Disturb
ABC
21
DEF
3
54
MNOJKLGHI
6
TUV
87
WXYZ
9
OPER
PQRS
0
and select Contact
Directory
.
2. Press
More and then Add to enter
another contact into the phone’s da
-
tabase or highlight an existing entry
then press Edit.
3. Enter first and/or last name from the
keypad. Press the
1/A/a soft key
to select between numeric and up-
per/lower case alphanumeric modes.
Press the Encoding soft key to access
special characters in other languages
if necessary.
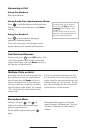
4. Enter the Contact number. This is a
required field and it must be unique
(not already in the directory).
► The Speed Dial Index will automati-
cally be assigned the next available
index value.
5. Ring Type and Divert Contact may
be left blank.
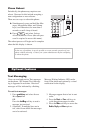
6. Use
Hold
De
l
Se
l
1 3
DEF
5
JKL
4
GHI
6
MNO
8
TUV
7
PQRS
9
WXYZ
0
OPER
*
#
2
ABC
Hold
Menu
Messages
Do Not Distur
b
ABC
21
DEF
3
54
MNOJKLGHI
6
TUV
87
WXYZ
9
OPER
PQRS
0
Directories
Services
Conference
Transfe
r
Redial
and
Hold
De
l
Se
l
1 3
DEF
5
JKL
4
GHI
6
MNO
8
TUV
7
PQRS
9
WXYZ
0
OPER
*
#
2
ABC
Hold
Menu
Messages
Do Not Distur
b
ABC
21
DEF
3
54
MNOJKLGHI
6
TUV
87
WXYZ
9
OPER
PQRS
0
Directories
Services
Conference
Transfe
r
Redial
to switch between
Enabled and Disabled settings for
the last four fields.
7. Press
Save to confirm or Cancel to
abandon the changes then press
Hold
Del
Sel
Conference
1 3
DEF
5
JKL
4
GHI
6
MNO
8
TUV
7
PQRS
9
WXYZ
0
OPER
*
#
2
ABC
Hold
Del
Sel
Directories
Services
Call Lists
Buddy Status
My Status
Redial
Menu
Messages
Do Not Disturb
ABC
21
DEF
3
54
MNOJKLGHI
6
TUV
87
WXYZ
9
OPER
PQRS
0
or the Exit soft keys to
return to the idle display.
To search for a particular contact:
1. Press
More and then Search from the
Contact Directory
menu.
2. Using the dial pad, enter the first few
characters for First or Last names.
3. Press
Search to search for contacts.
4. Successful matches can be dialed
from the resulting screen.
Contacts can be easily added from
Call Lists. See Call Lists for more
information.
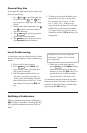
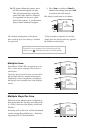
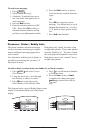
Speed Dial
Pre-assigned numbers can be associated
with line keys for rapid automated dial
-
ing. Speed Dial entries are consecutively
placed next to assigned line keys on the
phone. When a new entry is added to the
Contact Directory, it is automatically as
-
signed the next available speed dial index.
Speed dial assignemnts always appear
after line keys, and there can be no gaps
between subsequent speed dials.
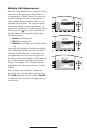
Example: To change a Speed Dial key assignment:
1. Press
Hold
Del
Sel
Conference
1 3
DEF
5
JKL
4
GHI
6
MNO
8
TUV
7
PQRS
9
WXYZ
0
OPER
*
#
2
ABC
Hold
Del
Sel
Directories
Services
Call Lists
Buddy Status
My Status
Redial
Menu
Messages
Do Not Disturb
ABC
21
DEF
3
54
MNOJKLGHI
6
TUV
87
WXYZ
9
OPER
PQRS
0
and select Contact
Directory. Highlight an existing
directory entry and press Edit,
► OR press and hold a line key which
already has a speed dial number
assigned to it. That contact in the
directory will automatically be
displayed.
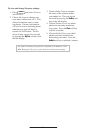
2. If a speed dial index already exists,
delete it by pressing the
Hold
Del
Sel
1 3
DEF
5
JKL
4
GHI
6
MNO
8
TUV
7
PQRS
9
WXYZ
0
OPER
*
#
2
ABC
Hold
Menu
Messages
Do Not Disturb
ABC
21
DEF
3
54
MNOJKLGHI
6
TUV
87
WXYZ
9
OPER
PQRS
0
Directories
Services
Conference
Transfer
Redial
the
Hold
Del
Sel
1 3
DEF
5
JKL
4
GHI
6
MNO
8
TUV
7
PQRS
9
WXYZ
0
OPER
*
#
2
ABC
Hold
Menu
Messages
Do Not Disturb
ABC
21
DEF
3
54
MNOJKLGHI
6
TUV
87
WXYZ
9
OPER
PQRS
0
Directories
Services
Conference
Transfer
Redial
keys.
3. If desired, enter a new speed dial
index. For example, enter speed dial
index as 1. This assigns the entry
to the first available line key on the
display,