


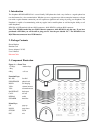
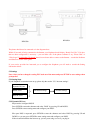

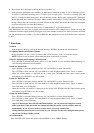
Figure 2——Side View
1——RJ-45 input port
2——RJ-45 output port
[KE1020A does not have this port]
3——Power Port
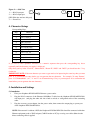
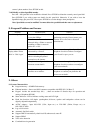
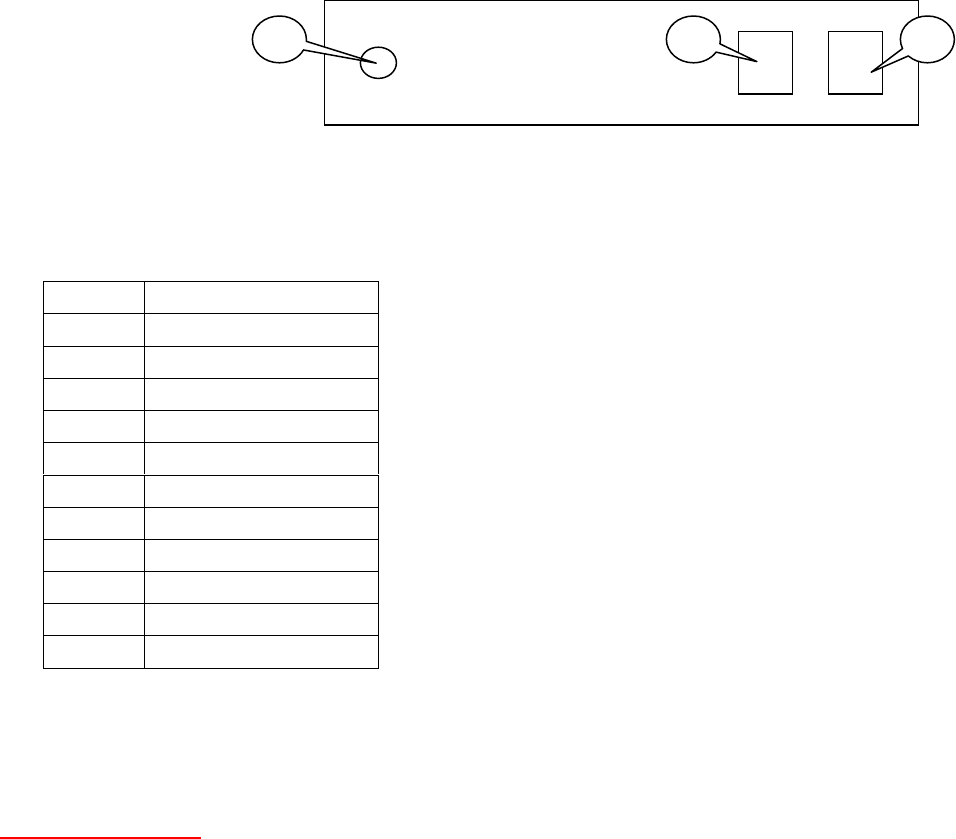
4. Character Strings
Corresponding Keys:
If you need to enter alphabetic characters or a numeric sequence then press the corresponding key above
repeatedly until the character you require is displayed.
Only when you key in the ‘Local IP’, ‘Subnet Mask’, ‘Router IP’,‘DNS1’ and ‘DNS2’ you should use the ‘*’ key
for the dot.
IMPORTANT NOTE:
If the next character you want to type needs to be input using the same key then you must
press ‘#’ to confirm the last entry before you can generate the next character. For example: To enter ‘Damon’,
press ‘3333326#666#66#’. (“m”, “o” and “n” are all entered using ‘6’ key so you must press ‘#’ to confirm the last
letter before you can generate the next character)
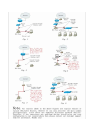
5. Installation and Settings
5.1 Installation
1 Place your Netphone-KE1020A/KE1020A near a power outlet.
2 Plug the RJ-45 connector of the Ethernet 10/100Base-T cable into the Netphone-KE1020A/KE1020A’s
side input port ,and plug the other side into a hub or switch, or wall/ground socket of the structuring
cable.
3 Plug the accessory power-adapter into the power outlet, then connect the output-plug to power-port
of the Netphone-KE1020A/KE1020A.
NOTE: If the network is without a HUB, the Netphone-KE1020A/KE1020A should be connected with other
Ethernet equipment (such as XDSL adapter, CABLE modem or PC) by crossing-over cable. Otherwise the
direct-connecting cable is applied.
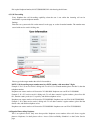
Key Characters
1 . ,' " 1 -
2 a b c 2 A B C 2
3 d e f 3 D E F 3
4 g h i 4 G H I 4
5 j k l 5 J K L 5
6 m n o 6 M N O 6
7 p q r s 7 P Q R S 7
8 t u v 8 T U V 8
9 w x y z 9 W X Y Z 9
0 ( ) @ 0 - * &
* *
1
3
2