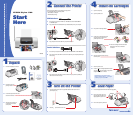
1 Remove everything from the box.
2 Remove the tape and
packing material.
3 Peel off the tape beneath the cover
and remove the insert.
4 Slide the paper support into
its three slots on the back
of the printer.
1
1
Unpack
Unpack
Turn On the Printer
Turn On the Printer
1 Plug the printer’s power cord into a grounded electrical outlet. (Don’t turn on
your computer yet.)
2 Press the power button to turn it on.
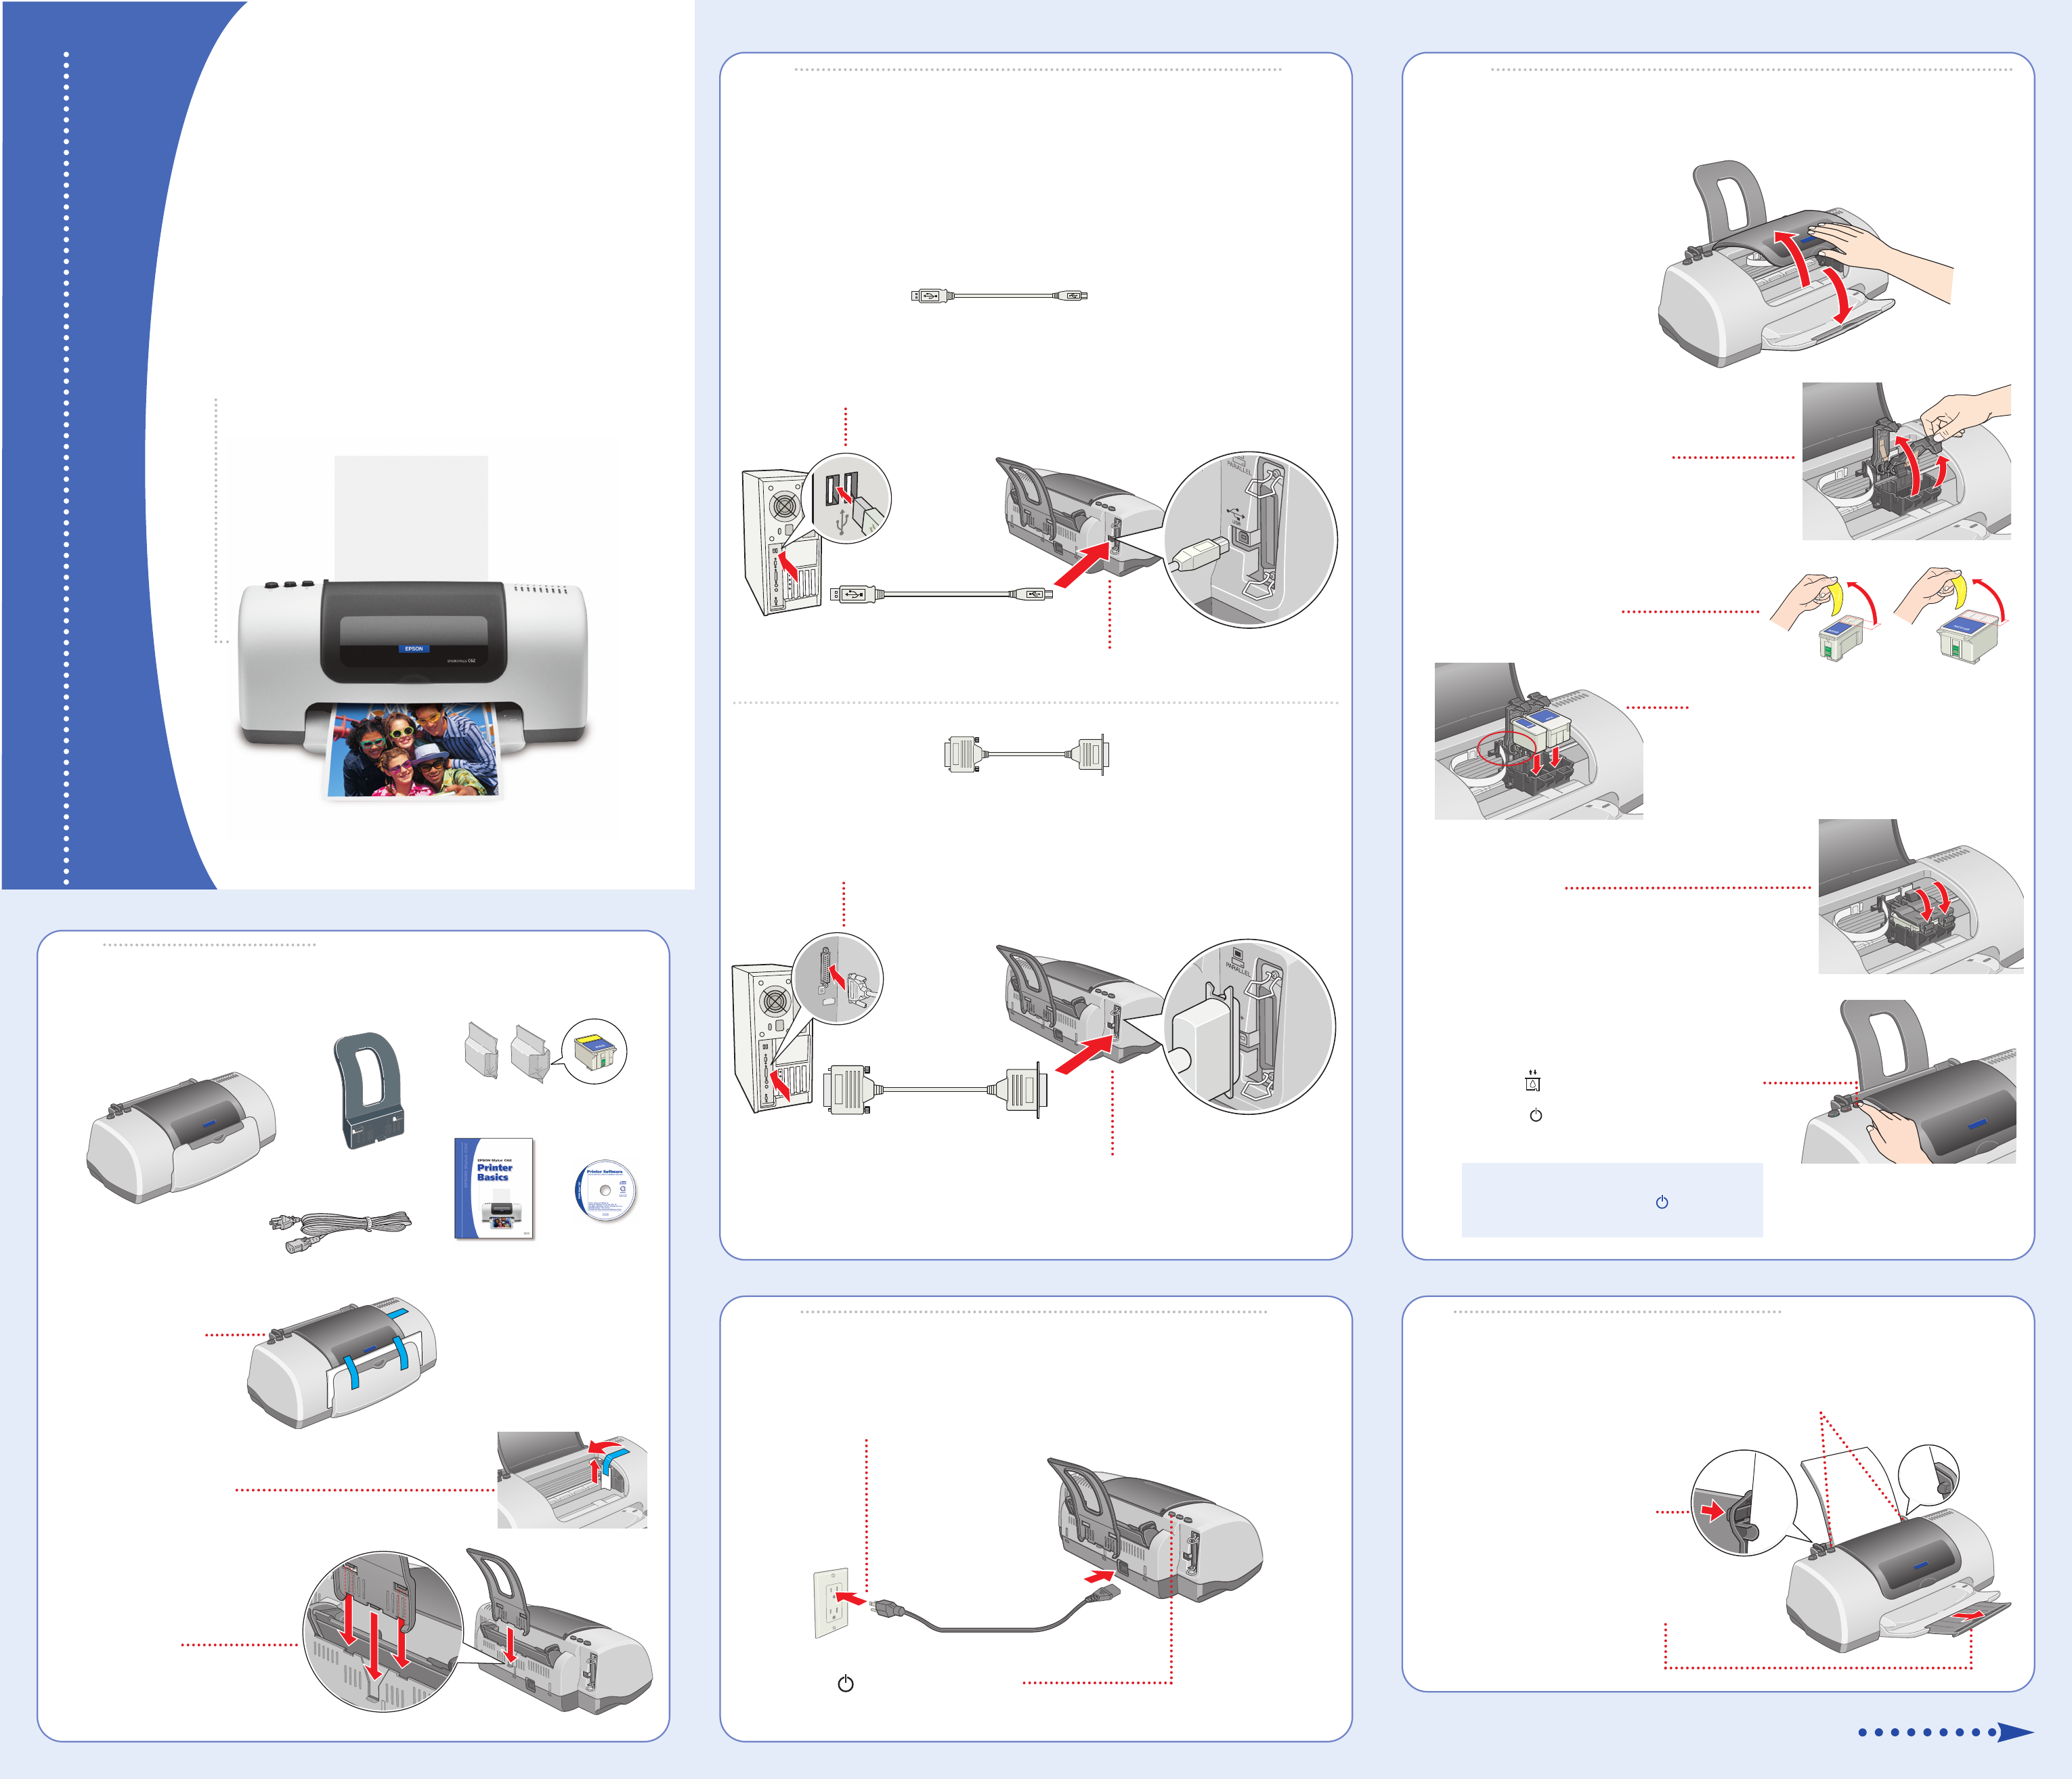
Install Ink Cartridges
Install Ink Cartridges
1 Open the output tray.
2 Open the printer cover.
3 Lift up both ink cartridge clamps.
4 Unpack the ink cartridges that came
with your printer and remove the
yellow tape from the top.
5 Lower each cartridge down into the holder.
Make sure the tabs rest on the hooks
in the back.
6 Shut the clamps and make sure they
click into place.
7 Close the printer cover.
8 Press the Ink Cartridge Replacement button.
The green power light flashes as your printer
charges ink for about 1
1
/
2
minutes.
CAUTION: Don’t turn off the printer or
interrupt charging while the power light
is flashing or you’ll waste ink.
Load Paper
Load Paper
1 Load some paper behind the tabs inside the edge guides.
2 Press in the locking tab on the
left edge guide and slide it to fit
lightly against the paper stack.
3 Pull out the output tray extension.
Turn over
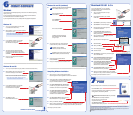
Printer connection cables are not included with your printer.
You need only one of the following cables:
• USB cable (PC or Mac) or
• Parallel cable (PC only).
USB Cable Users
1 Shut down your computer. In Windows
®
, click Start and select the Shut Down
or Turn Off option.
2 Plug the flat end of the USB cable into any available USB port on your computer.
3 Plug the square end of the cable into your printer’s USB port.
Parallel Cable Users
1 Shut down your computer. Click Start and select the Shut Down or Turn Off option.
2 Plug the end of the cable with the screws on the side into your computer’s parallel port
and secure it.
3 Plug the end of the cable with the slotted connector into your printer’s parallel port,
then secure it with the wire clips.
2
2
Connect the Printer
Connect the Printer
Printer
Paper
support
Ink cartridges
Printer Basics
Printer Software
CD-ROM
Output tray
Printer cover
Power cord
EPSON Stylus C62
Start
Here
Start
Here
EPSON Stylus
®
C62
CPD-14476
4031970-00
3
3
4
4
5
5