


http://www.pcstuff.philips.com
~ EXPLANATION ~
A 2.5/MMS205
4399 294 48731
Multimedia Speaker System
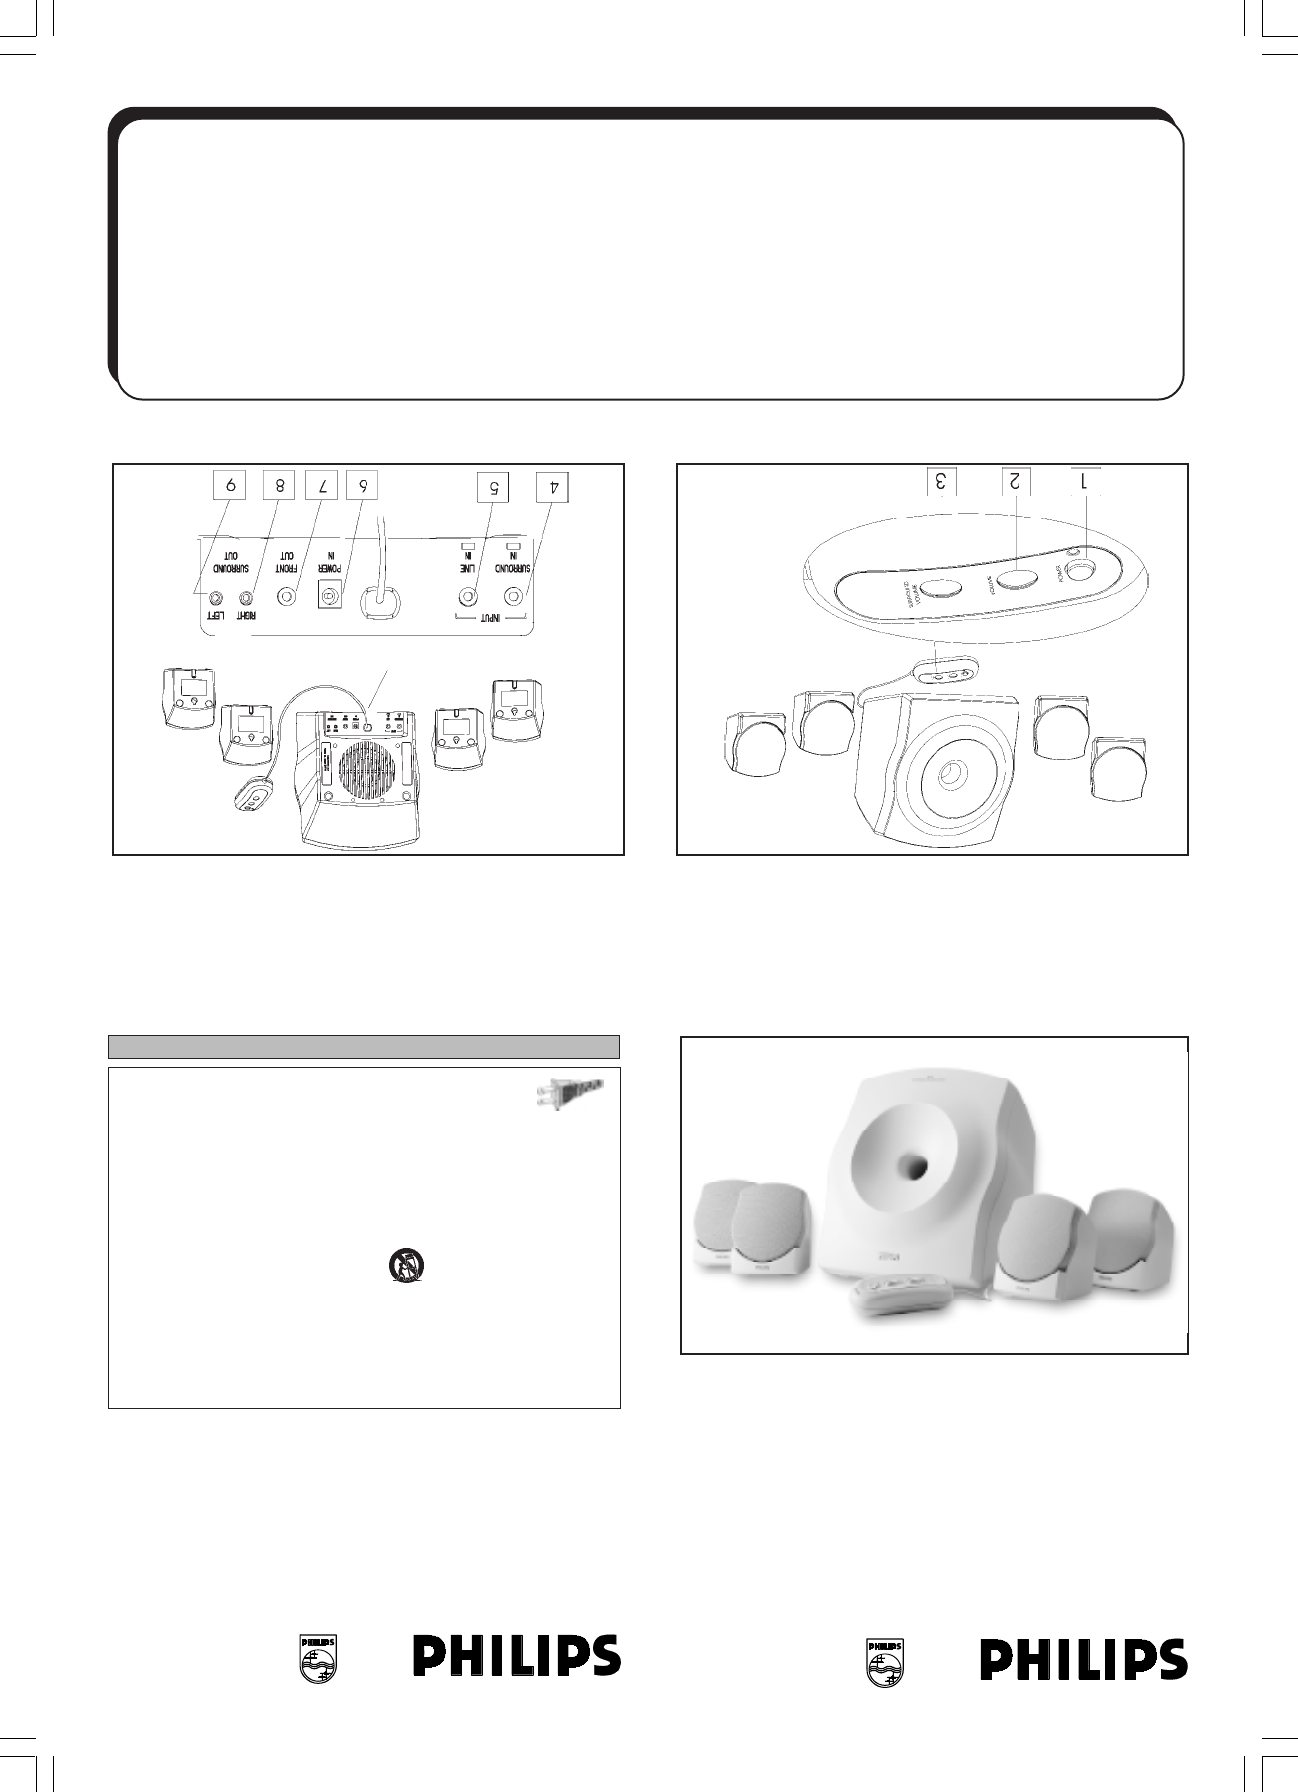
A 2.500 Compact Surround Power
The A 2.500 Compact Surround Power consists of 4 satellites, a
subwoofer and a remote control .To experience the excitement of surround sound
from this speaker set, it is preferred to have sound cards which provide 3D decoded
audio outputs. If your computer only has a stereo soundcard, the A 2.500 Compact
Surround Power will operate as a stereo speaker system. The front and surround
satellites on one side will be one stereo channel and the front and surround satellites
on the other side will be the other stereo channel. It is also possible to drive the A
2.500 Compact Surround Power from a DVD player that has two analogue outputs.
9. Do not defeat the safety purpose
of the polarized or grounding-type
plug. A polarized plug has two blades
with one wider than the other. A
grounding type plug has two blades
and a third grounding prong. The wide
blade or the third prong are provided for your safety. When
the provided plug does not fit into your outler, consult an
electrician for replacement of the obsolete outlet.
This product was designed and manufactured to meet strict
quality and safety standards. There are, however, some
installation and operation precautions which you should be
particularly aware of.
1. Read these instructions - All the safety and operating
instructions should be read before the appliance is operated.
2. Keep these instructions - The safety and operating
instructions should be retained for future reference.
3. Heed all warnings - All warnings on the appliance and in
the operating instructions should be adhered to.
4. Follow all instructions - All operating and use instructions
should be followed.
5. Do not use this apparatus near water - for example,
near a bathtub, washbowl, kitchen sink, laundry tub, in a wet
basement or near a swimming pool, etc.
6. Clean only with a damp cloth. The appliance should be
cleaned only as recommended by the manufacturer.
7. Install in accordance with the manufacturers
Instructions. Do not block any of the ventilation
openings. For example, the appliance should not be
situated on a bed, sofa, rug, or similar surface or placed in
a built-in installation, such as a bookcase or cabinet that may
impede the flow of air through the ventilation openings.
8. Do not Install near any heat sources such as radiators,
heat registers, stoves, or other apparatus (including amplifiers)
that produce heat.
IMPORTANT SAFETY INSTRUCTIONS - Read before operating equipment
10. Protect the power cord from being walked on or pinched
particulary at plugs, convenience receptacles, and the point
where they exit from the apparatus.
11. Only use attachments/accessories specified by the
manufacturer.
12. Use only with a cart, stand, tripod, bracket, or
table specified by the manufacturer, or sold with
the apparatus. When a cart is used, use caution
when moving the cart/ apparatus combination to
avoid injury from tip-over.
13. Unplug this apparatus during lightning storms or when
unused for long periods of
time.
14. Refer all servicing to qualified service personnel. Servicing
is required when the apparatus has been damaged in any
way, such as power-supply cord or plug is damaged, liquid
has been spilled or objects have fallen into the apparatus, the
apparatus has been exposed to rain or moisture, does not
operate normally, or has been dropped.
EL 4562-E004: 99/3
For US/Canada only
AC
Polarized Plug
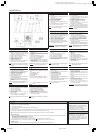
1) POWER ON/OFF
To switch ON or OFF power
The green LED indicates that the power
is On
2) R
OTARY VOLUME CONTROL
To adjust the volume higher or lower
3) ROTARY SURROUND VOLUME CONTROL
To adjust the surround volume higher
or lower
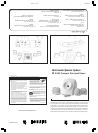
4) S
URROUND IN (BLACK COLOR)
To connect the S
URROUND IN cable for the
surround speakers from O
UT 2 at the
soundcard/ sound force
5) L
INE IN (GREEN COLOR)
To connect the L
INE IN cable for the front
speakers from O
UT 1 at the soundcard/
sound source
6) P
OWER IN
To connect the AC/AC adapter
7) F
RONT OUT
To connect both front left and right
satellite speakers
8) S
URROUND OUT RIGHT
To connect the surround right satellite
speaker
9) S
URROUND OUT LEFT
To connect the surround left satellite
speaker
The design of the satellites offers wall
mounting as an option.
A2.5new.p65 1/31/01, 10:15 AM1