Favorite icon
Power button
Power adapter
Palm
™
Desktop
software CD-ROM
* Problems? If the HotSync process did not work,
see Troubleshooting on the other side of this
document.
HotSync process
Palm Zire handheld
USB HotSync
®
cable
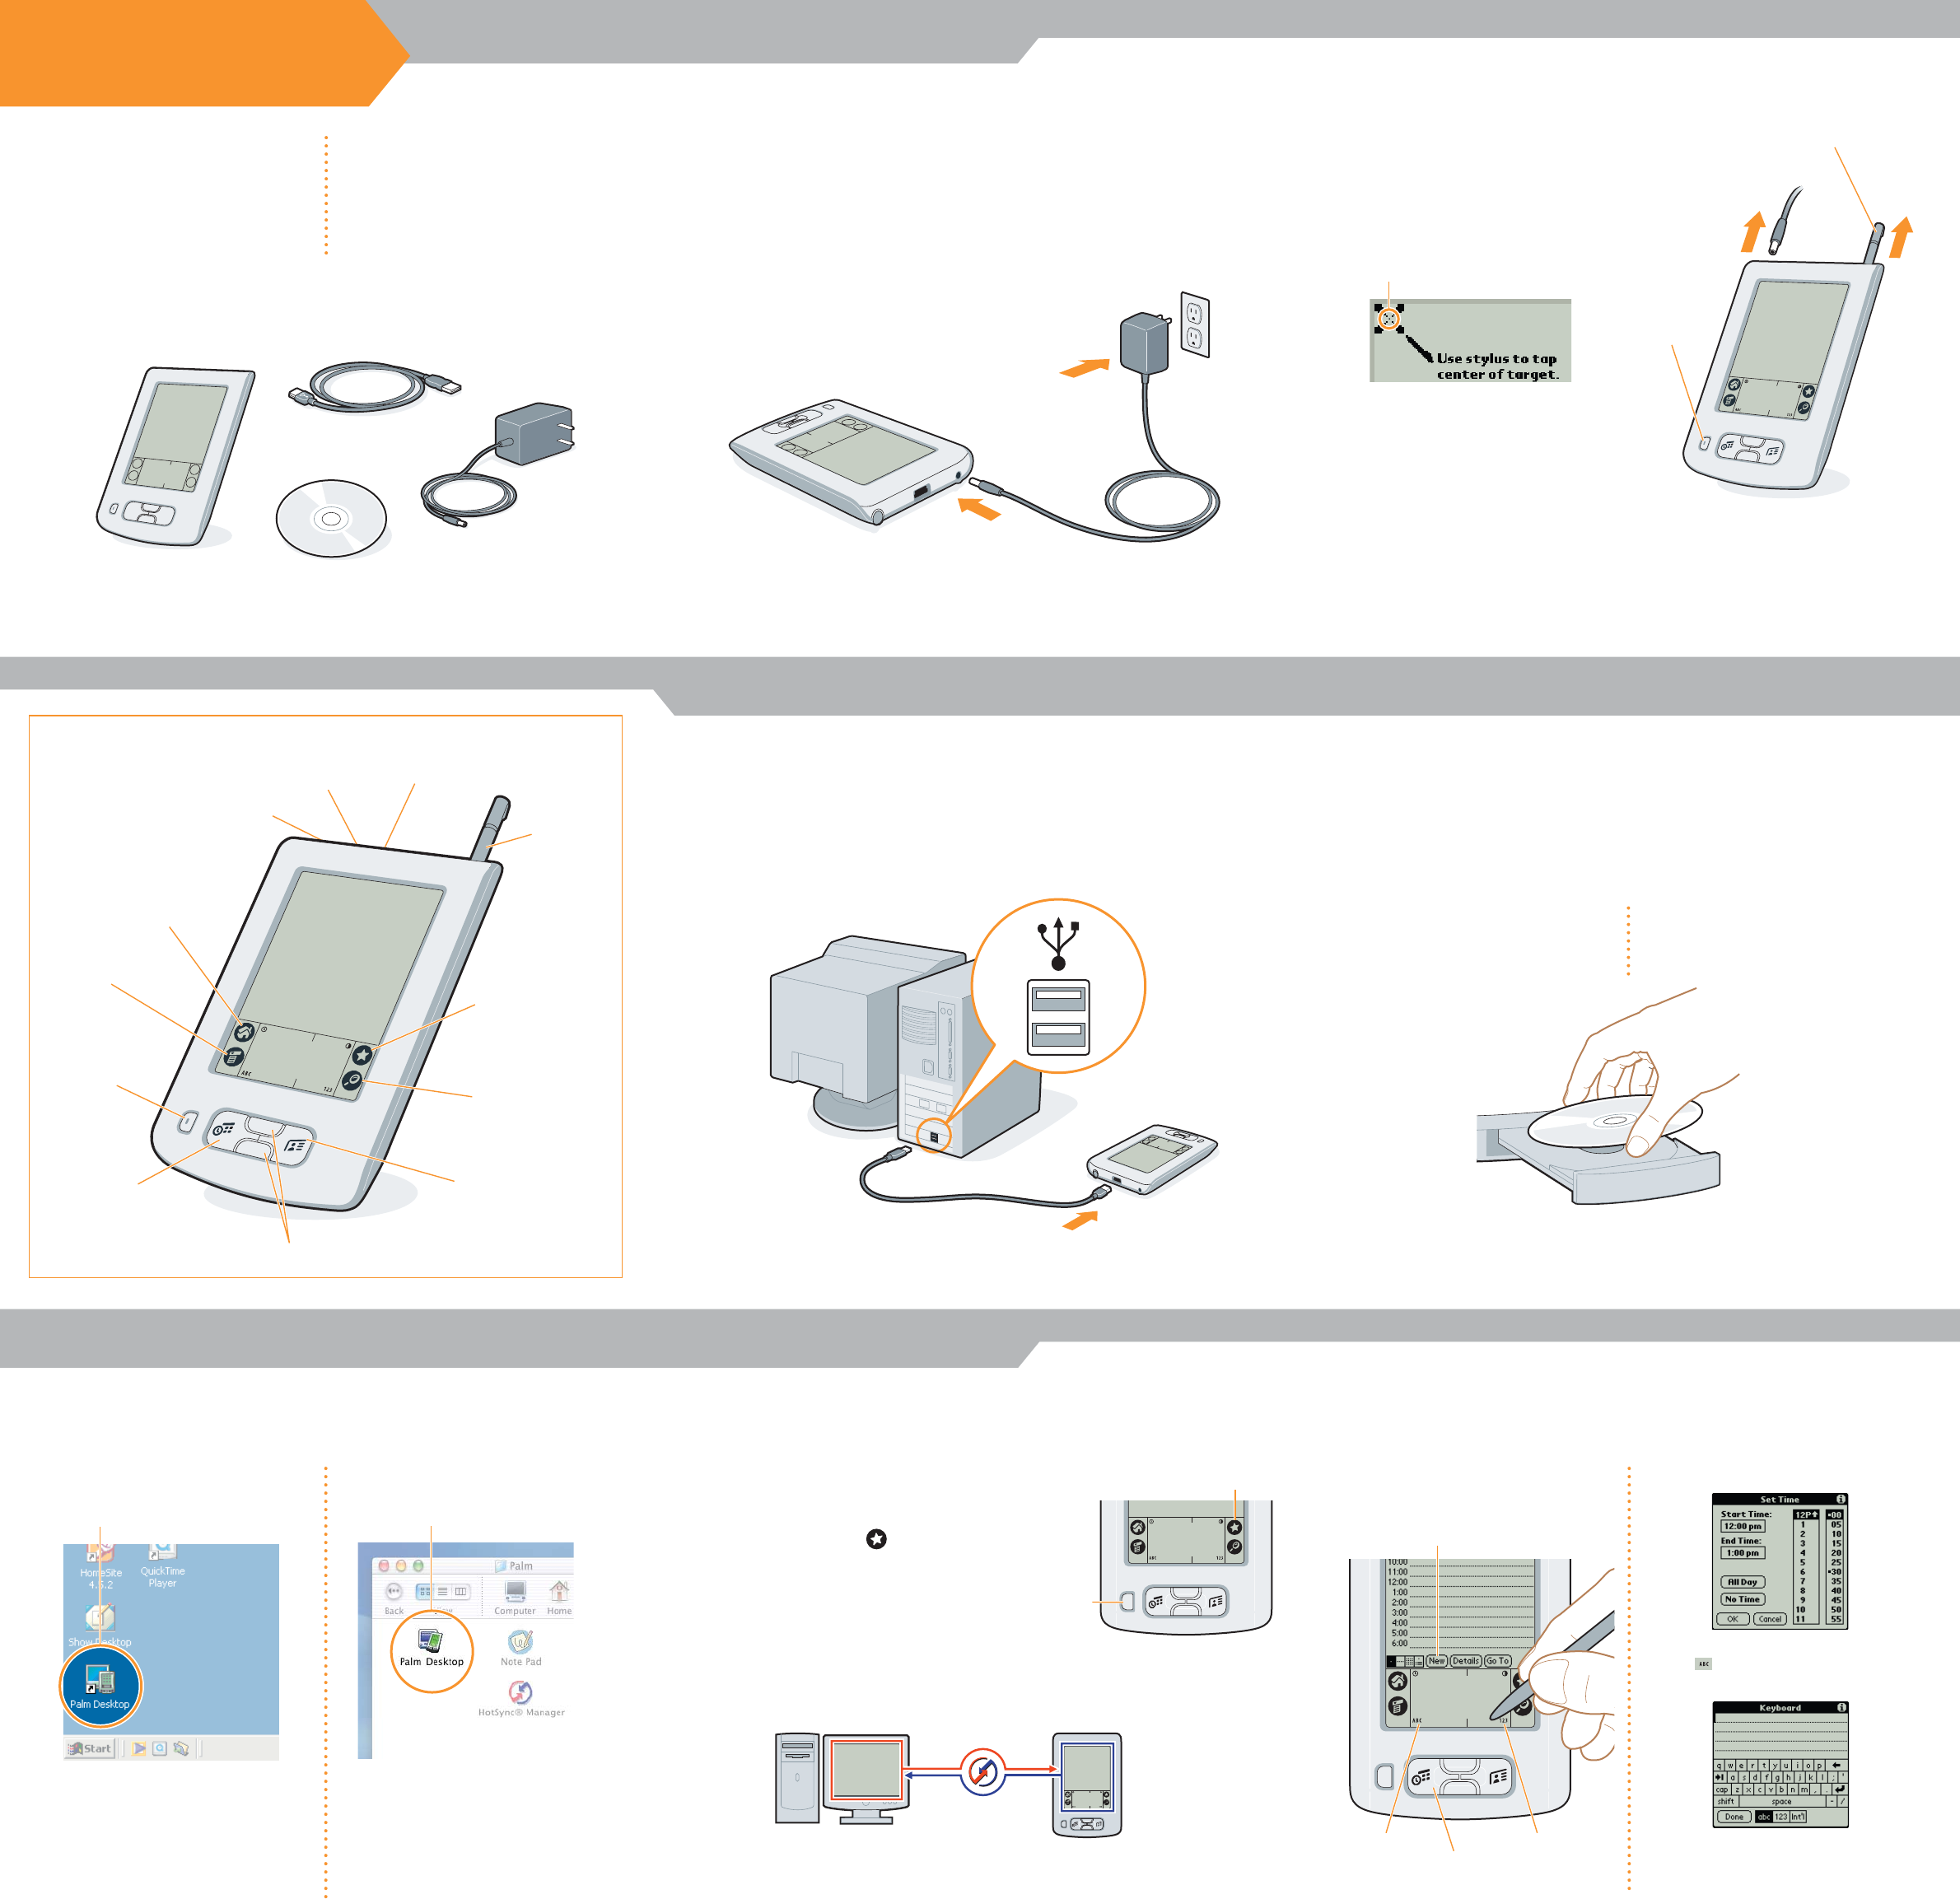
a. Plug the power adapter into your Zire handheld and into an outlet.
b. Charge for three hours.
a. Unplug the adapter.
b. Press the power button.*
c. Remove the stylus.
d. Follow Setup instructions on the screen.
e. Tap firmly the center of at least 3 targets.
f. Complete Basic Skills.
* Problems? See Troubleshooting on the
other side of this document.
Stylus
Power button
Center
a. Connect the HotSync cable to your handheld.
b. Connect the cable to a USB port on your computer.
Enter appointments and addresses using Palm Desktop software. Then transfer
the information to your handheld using the HotSync process. It’s the fastest way
to enter lots of your information.
a. Put the CD-ROM in the CD-ROM drive.
Mac:
a. Double-click the Palm Desktop icon
in the Palm folder.
b. Create or select a username to
identify your information.
c. Select Event from the Create menu.
d. Enter the appointment, and then click
OK to save it.
* Problems? If the HotSync process did not
work, see Troubleshooting on the other side
of this document.
What is a HotSync process?
The HotSync process synchronizes information on your handheld and in Palm
Desktop software, so that information you enter in one appears in both places.
a. Connect the HotSync cable to your handheld and
computer (see step 3).
b. Press the power button to turn on the handheld.
c. Tap the Favorite icon to start the HotSync
process.
Install Palm Desktop Software on your computer
Enter and synchronize your information
Charge
Transfer your appointment to
your handheld
Set up
1
3
USB
Here’s what you’ll do:
• Charge and set up your Palm
™
Zire
™
handheld.
• Install Palm
™
Desktop software.
• Learn to use your handheld.
Already use a Palm
™
handheld?
• Complete steps 1 and 2.
• Open your web browser. Go to
www.palm.com/support/zire.
• Click the link leading to upgrading
information.
Windows:
b. Follow the installation instructions
that appear on your computer
screen.*
Mac:
b. Double-click the Palm Desktop
Installer icon.*
ABC
Date Book
123
a. Press the Date Book button.
b. Tap New.
c. Tap to set the time. Tap OK.
d. Tap to display the onscreen
keyboard. Tap the keyboard to type.
e. Repeat the HotSync process
(see step 6).
New
2
Contents
Connect
Install Palm Desktop software
4
7
6
Now schedule an appointment
on your handheld
5
Try it! Schedule an appointment
Start Here
Windows:
a. Double-click the Palm Desktop icon
on your computer desktop.
b. Click New Event in the lower-left
corner.
c. Enter the appointment, and then click
OK to save it.
Date Book
(Press to turn on
handheld and open
Date Book.)
Scroll Up/Scroll Down
Address Book
(Press to turn on
handheld and open
Address Book.)
Find
Favorite
(Tap to perform the
HotSync process.)
Stylus
USB port
(for HotSync cable)
IR (infrared) port
Power adapter
connection
Home
(Tap to go to
Applications
Launcher.)
Menu
Power button
(Press to turn
handheld
on/off.)


