


Disposal of Old Electrical & Electronic Equipment
(Applicable in the European Union and other European
countries with separate collection systems)
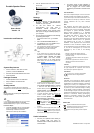
Portable Speaker Phone
User’s Guide
Version 1.0
Introduction and Features
System Requirement
• Pentium 4/Celeron, AMD 1GHz or faster
processor, minimum 256MB RAM
• Microsoft Windows ME/2000/XP/Vista series
• USB compatible
Package Contents
• Portable Speaker Phone with USB cable
• Setup Installation and Software CD
• User Guide
Getting started
You will need to install the drivers and application
software in the included CD before
connecting the unit.
Do not connect your new unit to your computer before
installing the drivers.
Tips
If you accidentally begin installation with your unit connected
and the Add New Hardware Wizard or Found New
Hardware Wizard dialog box appears, click the Cancel tab.
Installation Steps:
1.
Insert the Installation CD into your CD-ROM
drive. The installation program should start
automatically. Follow the on-screen
instructions to finish up the installation.
2. Click the “Speaker Phone Driver” icon to install
device driver.
3. Select “User Guide” to know more about detail
setting.
Settings
Audio setting
1. To use this device, you will need to have
Microsoft Windows ME/2000/XP/Vista
installed on your computer.
2. To use this device for internet
communication, you must have a
broadband internet connection and
applicable software which supports audio
calls (such as Skype) installed properly on
your computer.
3. You can verify and adjust the audio settings
by following these steps:
i. In the Windows Start menu, go to Control
Panel
ii. Select the Sound and Audio device icon
iii. In the Audio tab, click on the volume button, a
Volume Control
screen appears
iv. You can adjust the volume of the microphone
and speaker by using the control buttons
located at the front of the unit directly.
Tips
1. If you cannot hear any sound from the unit,
close all your current applications. Select
Start
Æ Control Panel ->Sounds and Audio
devices -> Audio -> then select “C-Media
USB audio Device” as the default Windows
Audio device for both sound playback and
sound recording.
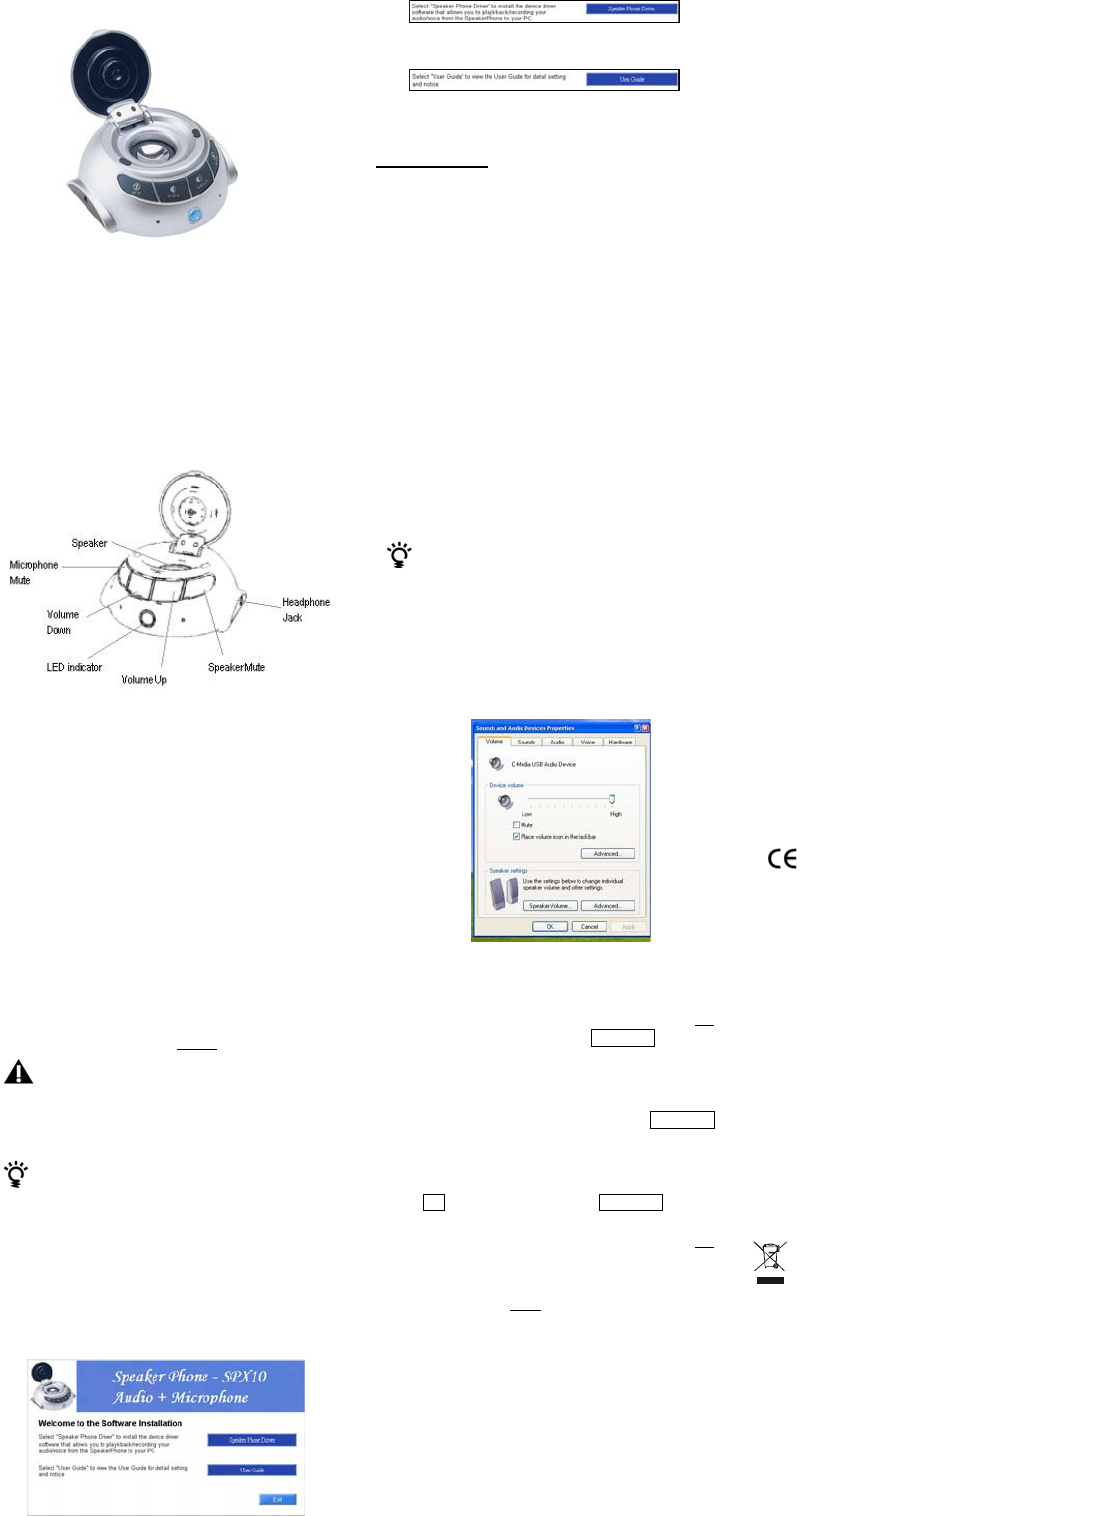
2. To check volume settings or when there is no
sound from the unit, repeat step 1) above to
select Sounds and Audio devices -> Volume
-> make sure that “Mute” check box is not
checked. When you select Advanced button, a
“
Volume Control
” screen pops-up. You may
adjust volume up or down accordingly.
3.
To check microphone settings, bring up the
“Volume Control” screen, click Advanced
button and select Options -> Properties ->
Adjust volume for -> Recording.
4. Make sure “
Recording
” is checked
and click
OK, there will be a new Advanced button.
Select “Options -> “Advanced Controls ->
Other Controls”. Make sure that “
AGC
” is not
checked.
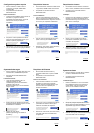
5. If your unit’s LED changes from “blue” to “red”
color, it is in mute
recording state. Press the
“Microphone Mute”
button on your unit once
and the LED will change back to “blue” again.
Useful information
1. Connect your Speaker Phone directly to
the available USB port. Using an
extended cable or USB hub device is not
recommended.
2. For stereo sound of audio playback or
private conversation, stereo headphones
can be plugged into 3.5mm stereo
headphone jack located on the side of the
unit.
FCC Certification
This device complies with part 15 of the FCC rules.
Operation is subject to the following two conditions:
(1) This device may not cause harmful interference, and
(2) This device must accept any interference, received,
including interference that may cause undesired
operation.
Note:
This equipment has been tested and found to
comply with the limits for a Class B digital device,
pursuant to part 15 of the FCC Rules. These limits
are designed to provide reasonable protection
against harmful interference in a residential
installation. This equipment generates, uses, and
can radiate radio frequency, energy and, if not
installed and used in accordance with the
instructions, may cause harmful interference to radio
communications. However, there is no guarantee
that interference will not occur in a particular
installation. If this equipment does cause harmful
interference to radio or television reception, which
can be determined by turning the equipment off and
on, the user is encouraged to try to correct the
interference by one or more of the following
measures:
-
Reorient or relocate the receiving antenna.
- Consult the dealer or an experienced radio/TV
technician for help.
- Increase the separation between the equipment
and receiver.
- Connect the equipment into an outlet on a circuit
different from that to which the receiver is
connected.
CAUTION
Any changes or modifications not expressly approved by
the party responsible for compliance could void the
user’s authority to operate the equipment.
FOR EUROPE
“The unit is in conformity with the EMC
directive and low-voltage directive.”
Disclaimer
Information in this document is subject to change
without notice. The manufacturer does not make any
representations or warranties (implied or otherwise)
regarding the accuracy and completeness of this
document and shall in no event be liable for any loss
of profit or any other commercial damage, including
but not limited to special, incidental, consequential,
or other damages. No part of this document may be
reproduced or transmitted in any form by any means,
electronic or mechanical, including photocopying,
recording or information recording and retrieval
systems without the express written permission of
the manufacturer.
WEEE LOGO
All trademarks and logos belong to their respective
owners.
3100554010 Version 1.0 July 2007