3-9
Cisco Wireless LAN Controller Configuration Guide
OL-8335-02
Chapter 3 Configuring Ports and Interfaces
Configuring the Management, AP-Manager, Virtual, and Service-Port Interfaces
Note A zero value for the VLAN identifier (on the Controller > Interfaces page) means that the interface is
untagged.
The default (untagged) native VLAN on Cisco switches is VLAN 1. When controller interfaces are
configured as tagged (meaning that the VLAN identifier is set to a non-zero value), the VLAN must be
allowed on the 802.1Q trunk configuration on the neighbor switch and not be the native untagged VLAN.
Cisco recommends that only tagged VLANs be used on the controller. You should also allow only
relevant VLANs on the neighbor switch’s 802.1Q trunk connections to controller ports. All other
VLANs should be disallowed or pruned in the switch port trunk configuration. This practice is extremely
important for optimal performance of the controller.
Note Cisco recommends that you assign one set of VLANs for WLANs and a different set of VLANs for
management interfaces to ensure that controllers properly route VLAN traffic.
Follow the instructions on the pages indicated to configure your controller’s interfaces and ports:
• Configuring the Management, AP-Manager, Virtual, and Service-Port Interfaces, page 3-9
• Configuring Dynamic Interfaces, page 3-14
• Configuring Ports, page 3-17
• Enabling Link Aggregation, page 3-27
• Configuring a 4400 Series Controller to Support More Than 48 Access Points, page 3-30
Configuring the Management, AP-Manager, Virtual, and
Service-Port Interfaces
Typically, you define the management, AP-manager, virtual, and service-port interface parameters using
the Startup Wizard. However, you can display and configure interface parameters through either the GUI
or CLI after the controller is running.
Using the GUI to Configure the Management, AP-Manager, Virtual, and
Service-Port Interfaces
Follow these steps to display and configure the management, AP-manager, virtual, and service-port
interface parameters using the GUI.
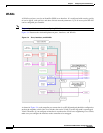
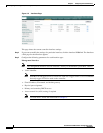
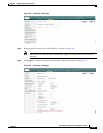
Step 1 Click Controller > Interfaces to access the Interfaces page (see Figure 3-5).


