


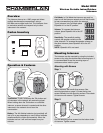
Carton Inventory
Overview
The Intercom has up to a 1000' range and allows
multiple simultaneous conversations, using a
900 Mhz secure digital radio link. The intercoms form
an exclusive network and respond only to other
intercoms in the network.
Mounting Tape
1
Alcohol Wipe
Intercom
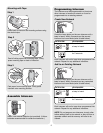
Operation & Features
Call Mode: In Call Mode the intercom may only be
used to call the intercom network and will not be able
to hear conversation from within the network.
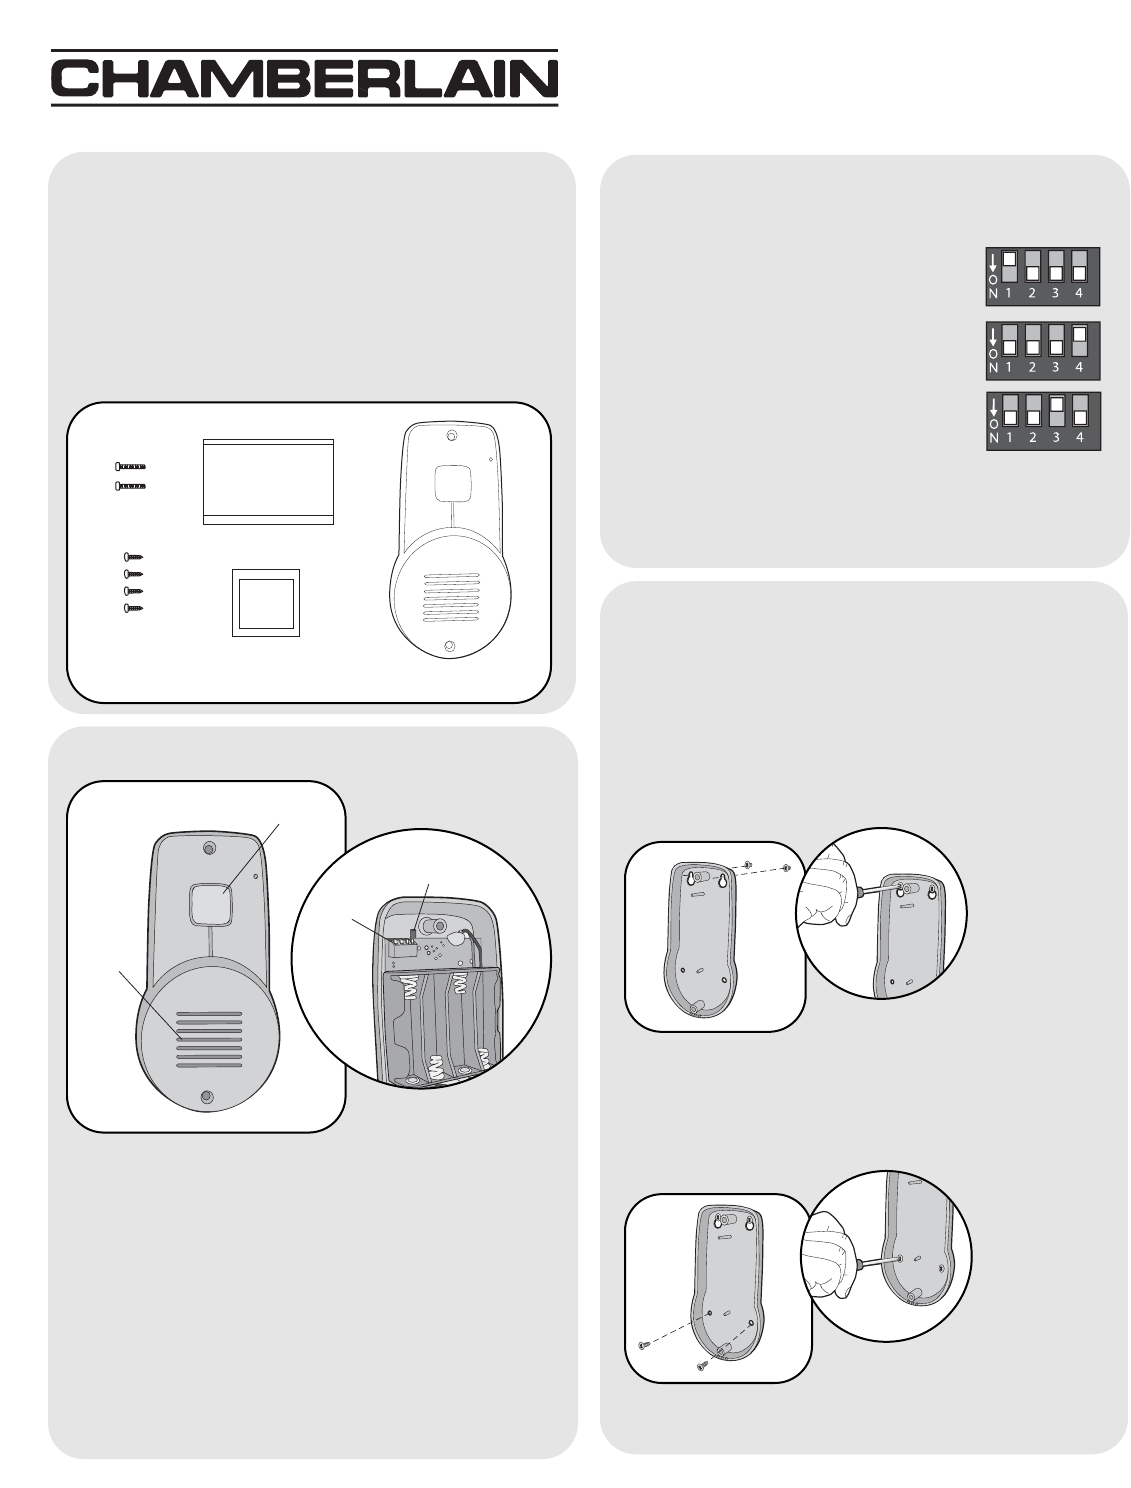
To put intercom into Call Mode place
Dipswitch #1 to the UP position.
Volume: To increase the intercom
volume, place Dipswitch #4 to the UP
position.
Sensitivity: The sensitivity setting
controls the speaker volume on the
other intercom. To increase the speaker volume on
the other intercom place Dipswitch #3 to the UP
position.
NOTE: Dipswitch #2 is not used.
Talk Button: To talk, hold down the Talk button and
all intercoms in the network will receive the signal.
When holding down the Talk button on a different
intercom, a secure channel is created and the other
intercoms in the network do not hear the
conversation.
Battery: The AA Alkaline batteries (not provided) will
last up to a year depending on use (Lithium batteries
recommended for colder environments). When the
batteries are low it will emit two beeps every ten
minutes.
Talk Button
Speaker
Model ROI2
Wireless Portable Indoor/Outdoor
Intercom
®
Learn Button
Dipswitch
Block
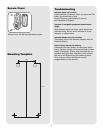
Mounting Intercom
Step 1
Mount Intercom with small silver screws. See
mounting template on page 3. Screw the top two
screws halfway into the mounting surface. Place back
of intercom over screws. Tighten screws.
The Intercom can be mounted by using the included
screws or by using the double-sided mounting tape. It
is recommended to use the mounting tape on
surfaces such as metal or glass.
Put the remaining silver screws into the bottom holes
of intercom. Tighten screws.
Mounting with Screws
Step 2